WebMaxy code Installation guide for WooCommerce
STEP 1: From your WebMaxy account, Go to the My websites page and Click the Tracking Code button.

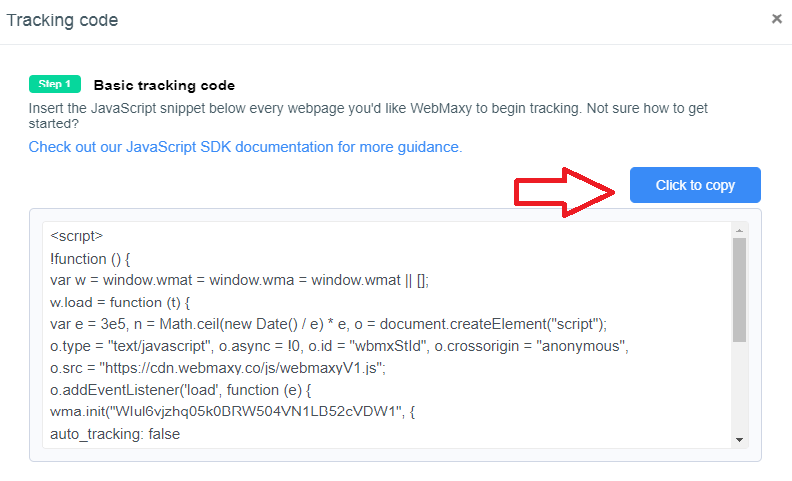
STEP 2: Copy the Tracking code.
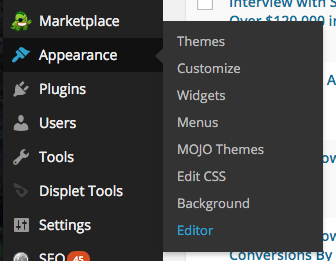
STEP 3: From the menu, select Appearance and open the WordPress Editor.
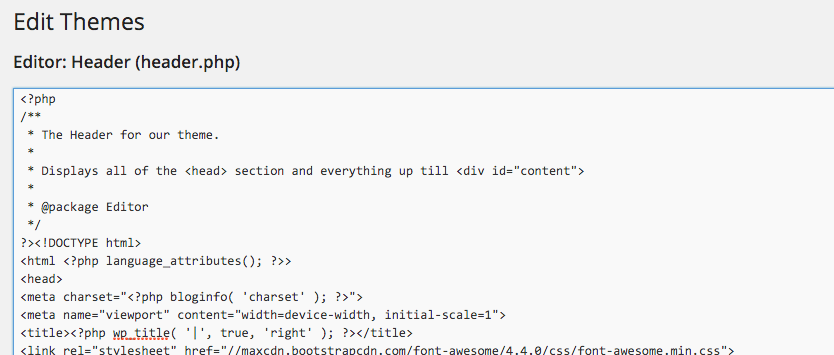
STEP 4: Select the Header (header.php).
The header.php file basic structure should be similar to the below.
STEP 5: Insert the WebMaxy Tracking Code within the <head> and </head> tags.
If your selected header.php file does not contain any <head> HTML tags. Then, find the correct file in your theme which contains header tags.
In such cases, we would suggest your theme’s designer or a WordPress specialist would be the most suitable place to start.
STEP 6: Your WebMaxy Tracking Code is now successfully installed.
In case your blogs use caching plugins, you should clear the cache to ensure the script is added to your website.
Adam Wilson #
Adam Wilson comes with an experience of 12+ years in the IT industry. As a Customer Success Manager, he has been researching and trying to understand the customers’ behavior in different scenarios. He has also studied human psychology to relate it to the purchase journey of the customers. His published books on customer psychology and behavior have received many honors and awards from various enterprises.