Any third-party scripts like WebMaxy installation are not allowed by the built-in Shopify checkout.
Regardless, we’ve provided a solution for tracking Shopify checkout flow as below:
- How to install WebMaxy on your Shopify site
- Solution for tracking the Shopify checkout flow
How to install WebMaxy on your Shopify site:
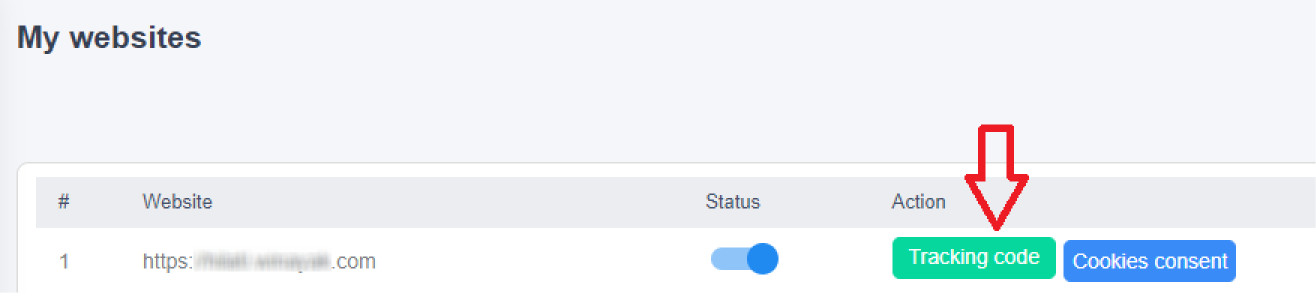
STEP 1: Open your WebMaxy account, Go to the My websites page.
STEP 2: Set the status switch turn ON & Click the Tracking Code button beside the website which you want to capture data.
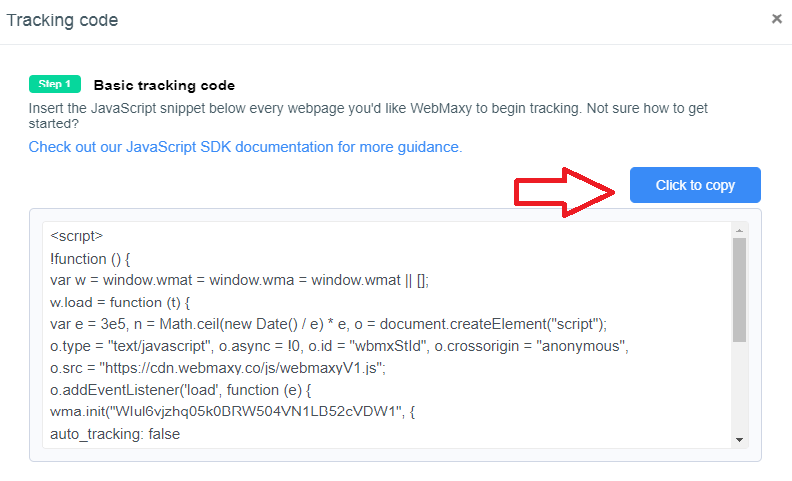
STEP 3: Goto Basic tracking code and click on the Click to copy button to track users’ activity.
STEP 4: Go to the Shopify Admin dashboard.
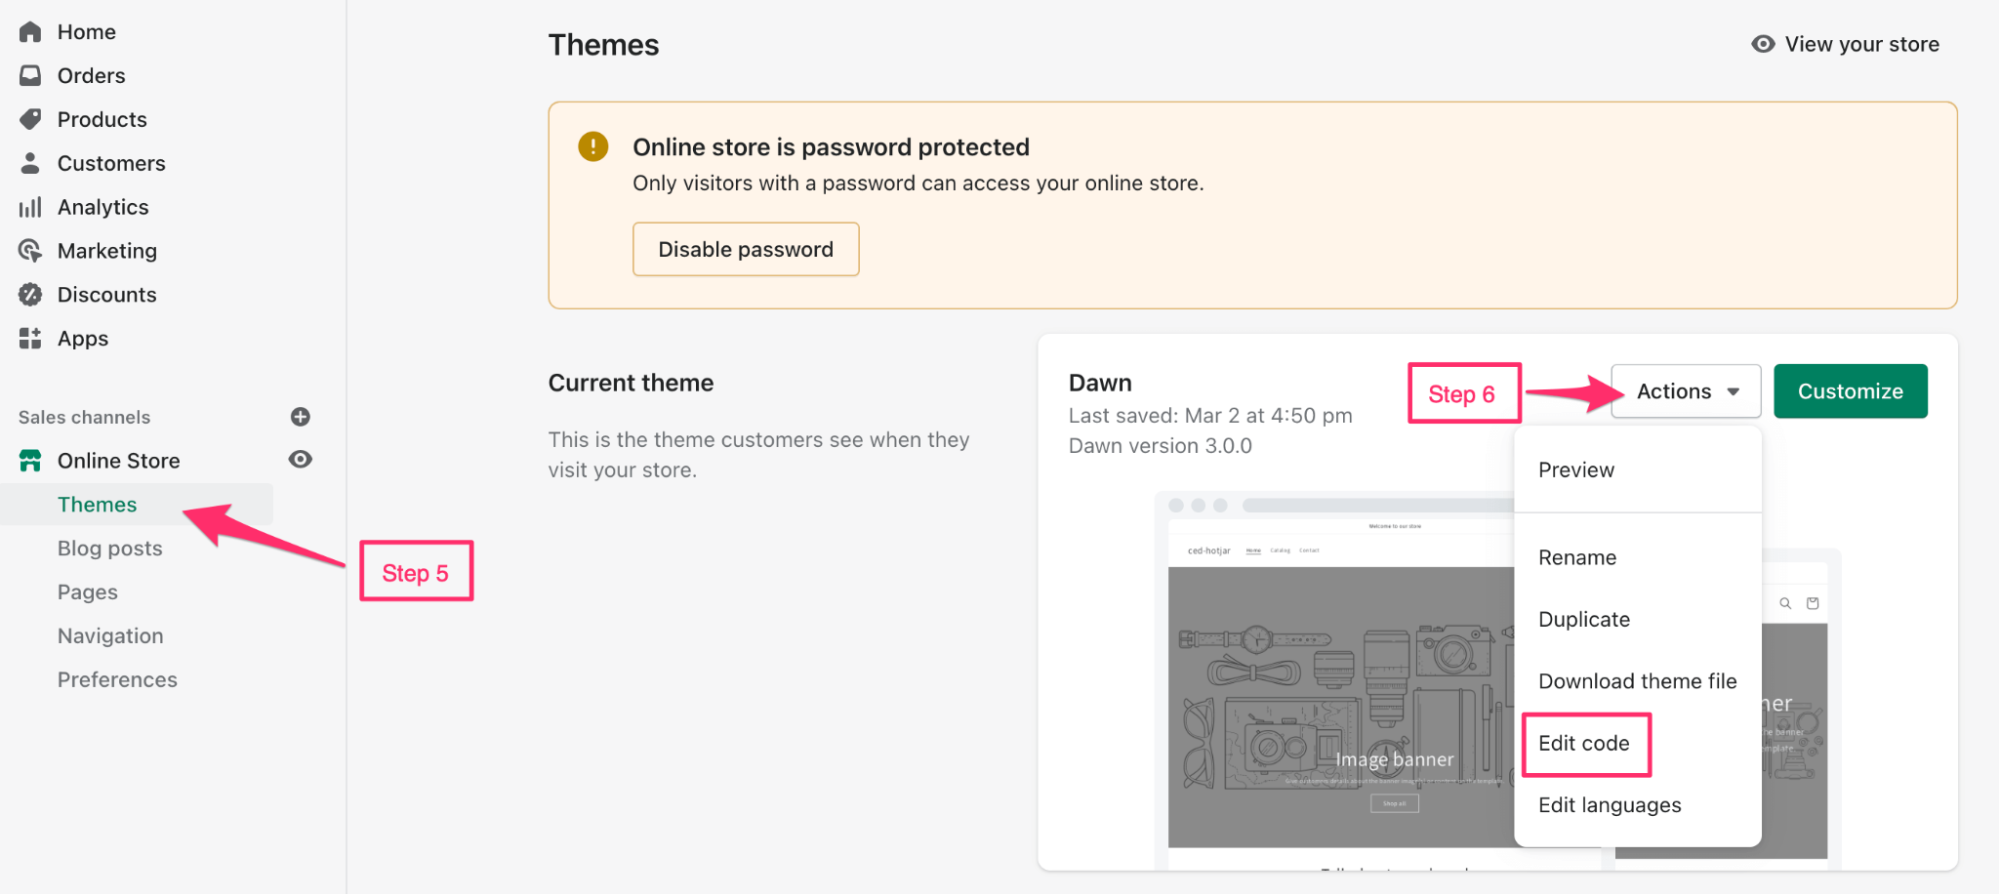
STEP 5: Select Online Store, and click on Themes.
STEP 6: From your current theme, click on the Actions dropdown after that select Edit code.
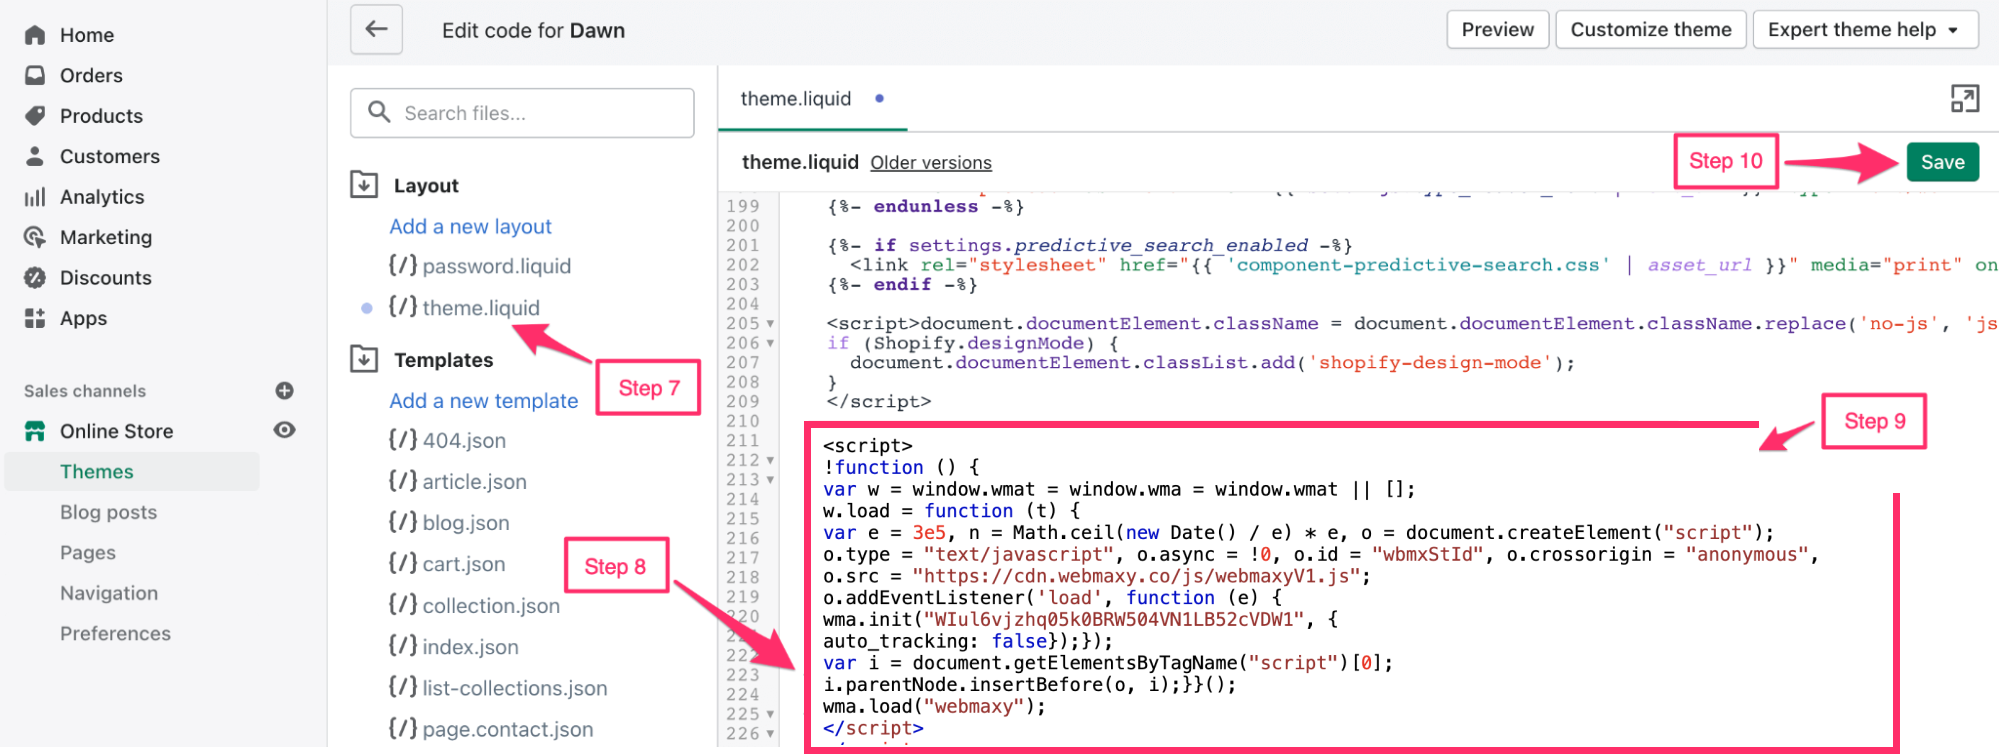
STEP 7: From the Layout folder, select the theme.liquid.
STEP 8: Scroll down the theme.liquid page till the </head> closing tag.
STEP 9: All the other variations (such as {/head}, [/header] ) of <head> </head> tags work in same way.
STEP 10: Paste your previously copied WebMaxy Tracking Code before the closing </head> tag.
STEP 11: Click on the Save button.
STEP 12: Now for installing the Tracking Code on your order status page, Go to Shopify Admin, and click on Settings.
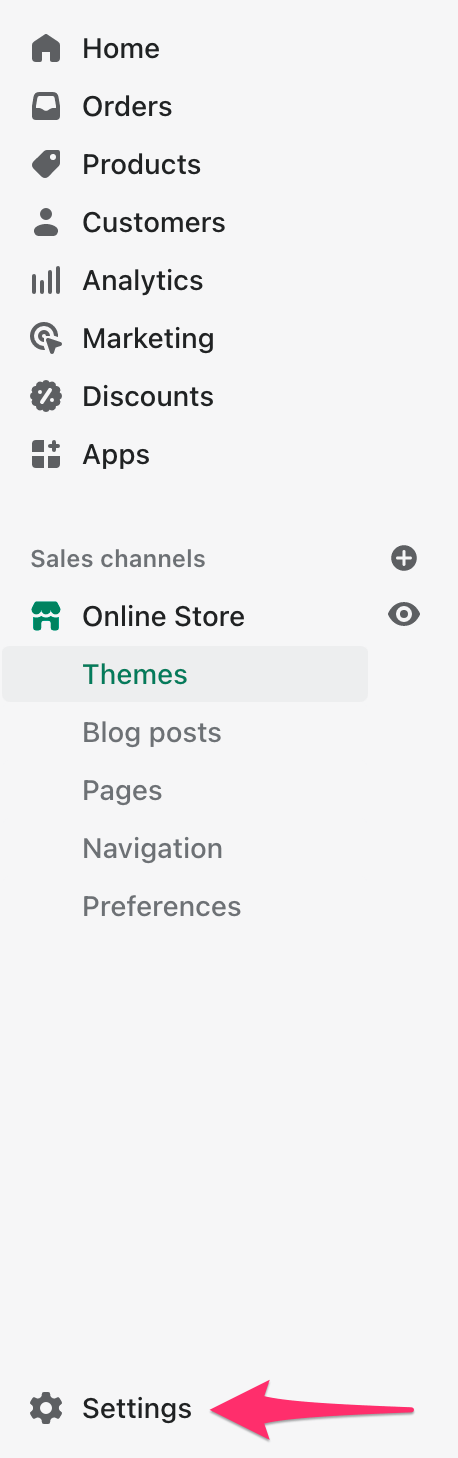
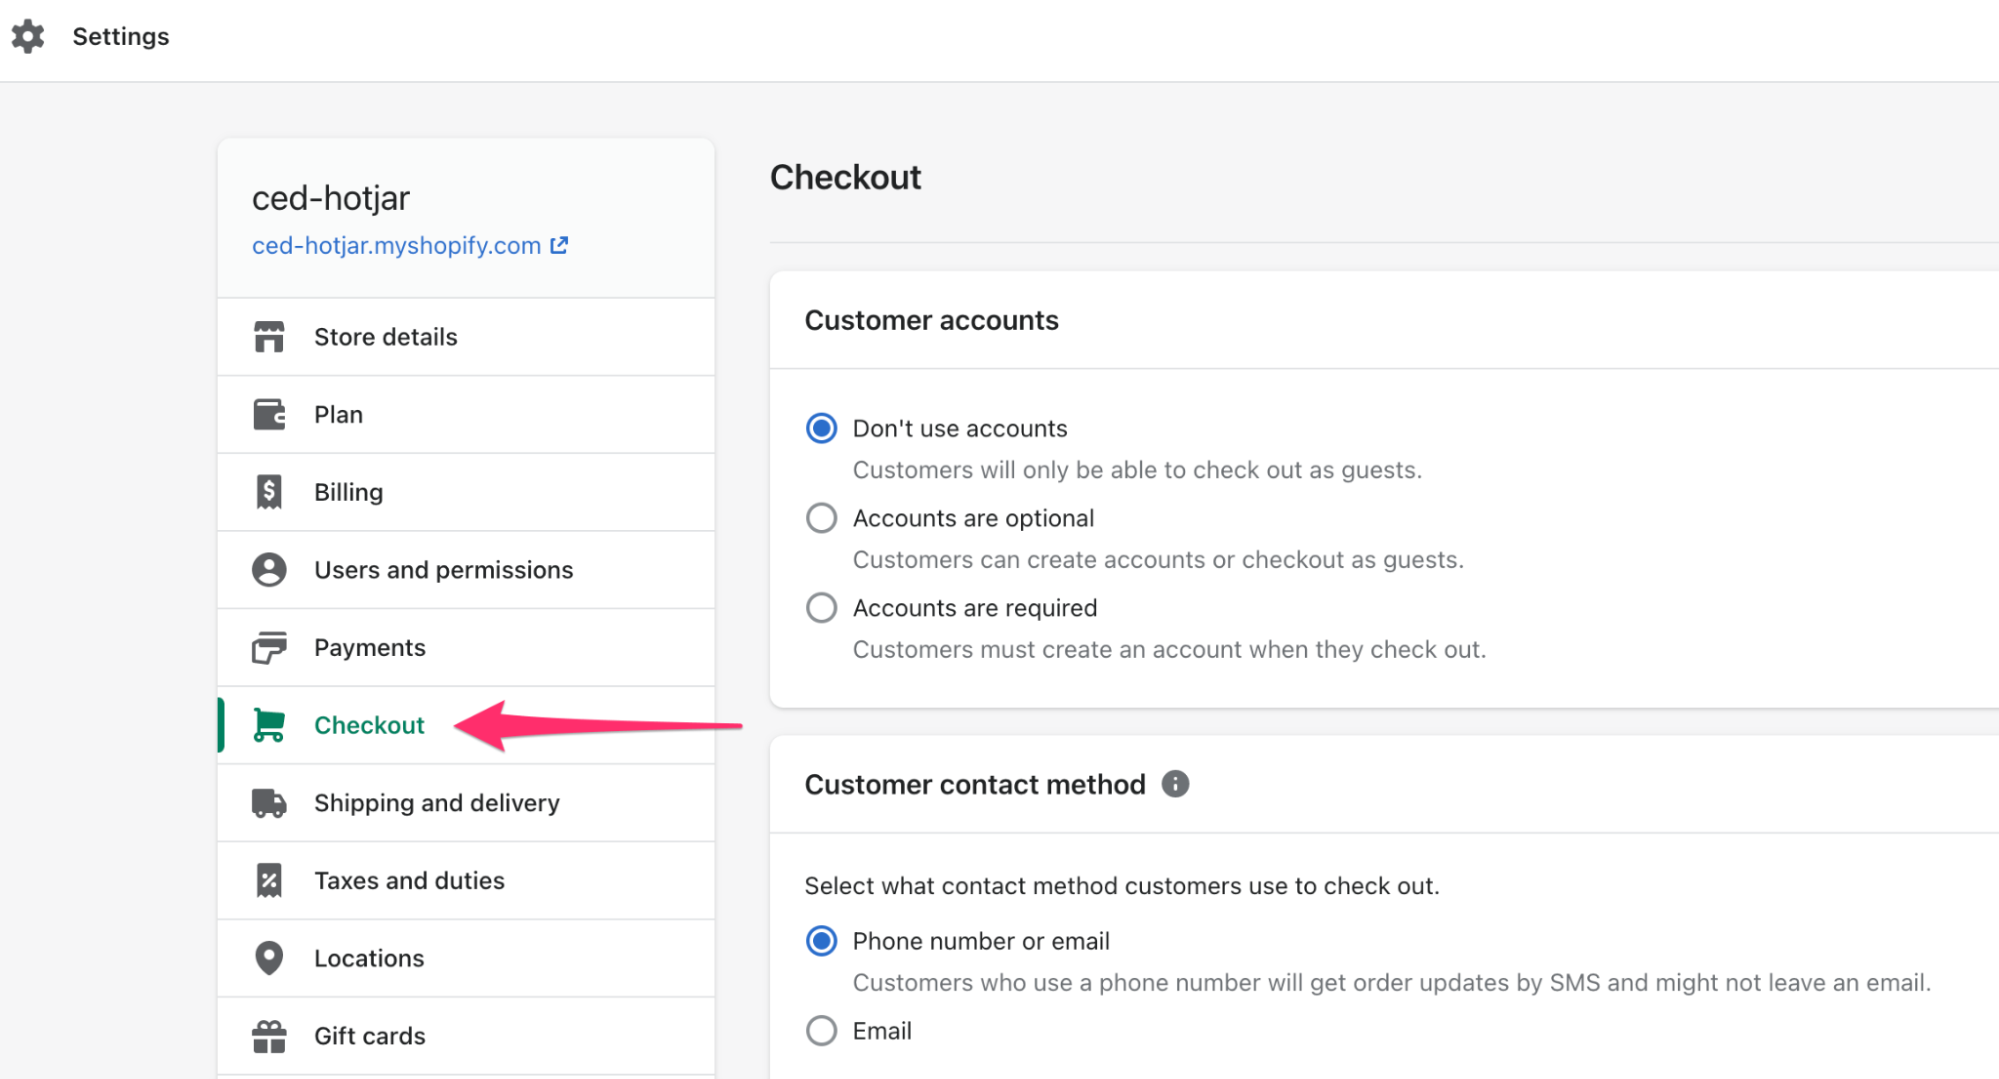
STEP 13: Click on the Checkout button.
STEP 14: Scroll down to the Order status page scripts section and paste the previously copied Webmaxy in the text field.
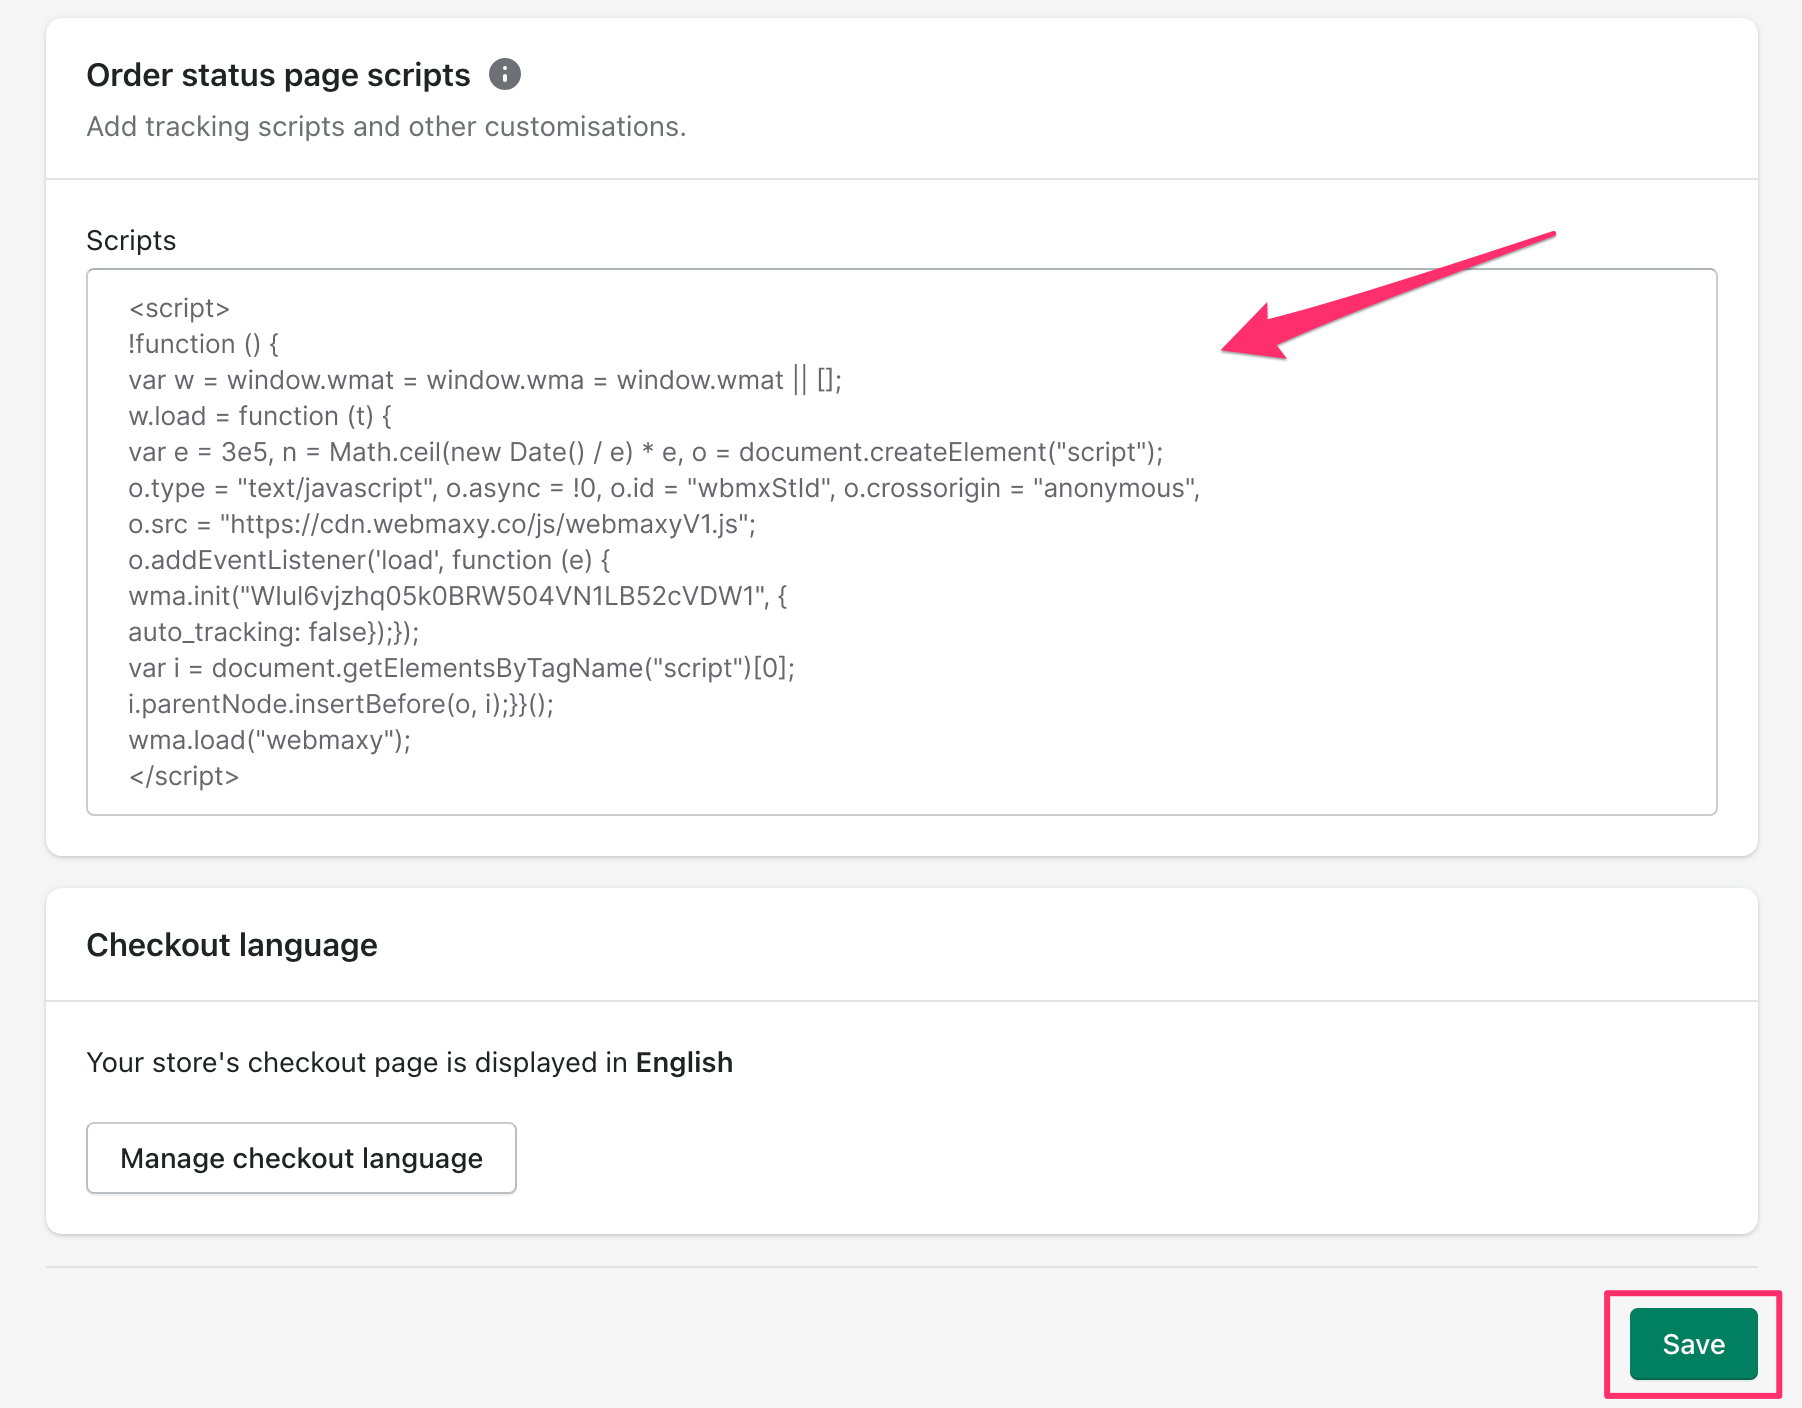
STEP 15: Click the Save button to save the changes.
Now the WebMaxy Tracking Code will get installed on your order status page. Unfortunately, the Tracking Code won’t get installed on your Shopify checkout, as any third-party scripts like WebMaxy installation are not allowed by the built-in Shopify checkout.
Solution for tracking the Shopify checkout flow
You can track the Shopify checkout flow with the below possible solutions:
Tracking the order status page:
Shopify allows WebMaxy to function on the order status page.
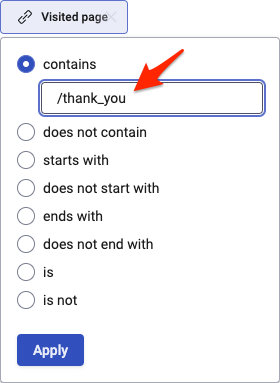
This helps in filtering users who have purchased by using the URL that contains a filter for Sessions Recording and Heatmaps. It is based on the order confirmation page URL.
Suppose there is a page that contains /thankyou after any purchase to visitors. You can filter Sessions Recordings and Heatmaps based on this URL.
Adding Event Triggers
By adding Event Triggers, compare items purchased by users against users not finishing the checkout process.
If you want to compare users who purchased against those who started the checkout process but did not finish.
Add Event triggers to the buttons that redirect users to the checkout page on your website.
To compare the below segments of visitors, Sessions Recordings can then be filtered based on these events.
- Users that clicked the buttons and finished the checkout process to the order confirmation.
- Users that clicked the buttons but were unable to finish the checkout process.
Adam Wilson #
Adam Wilson comes with an experience of 12+ years in the IT industry. As a Customer Success Manager, he has been researching and trying to understand the customers’ behavior in different scenarios. He has also studied human psychology to relate it to the purchase journey of the customers. His published books on customer psychology and behavior have received many honors and awards from various enterprises.