Install the WebMaxy Tracking Code with Google Tag Manager
The WebMaxy Tracking Code can be installed with Google Tag Manager in various ways:-
- Google Tag Manager integration
- WebMaxy Tracking Code tag in Google Tag Manager
- WebMaxy Tracking Code on GTM as a Custom HTML tag
Google Tag Manager integration
After adding your site to WebMaxy, We will firstly check whether WebMaxy has auto-detected your site & has a Google tag Manager container.
In case you had difficulty with the above step, you may integrate Google Tag Manager with the below steps:
STEP 1: Open your WebMaxy account and Go to the My websites page.
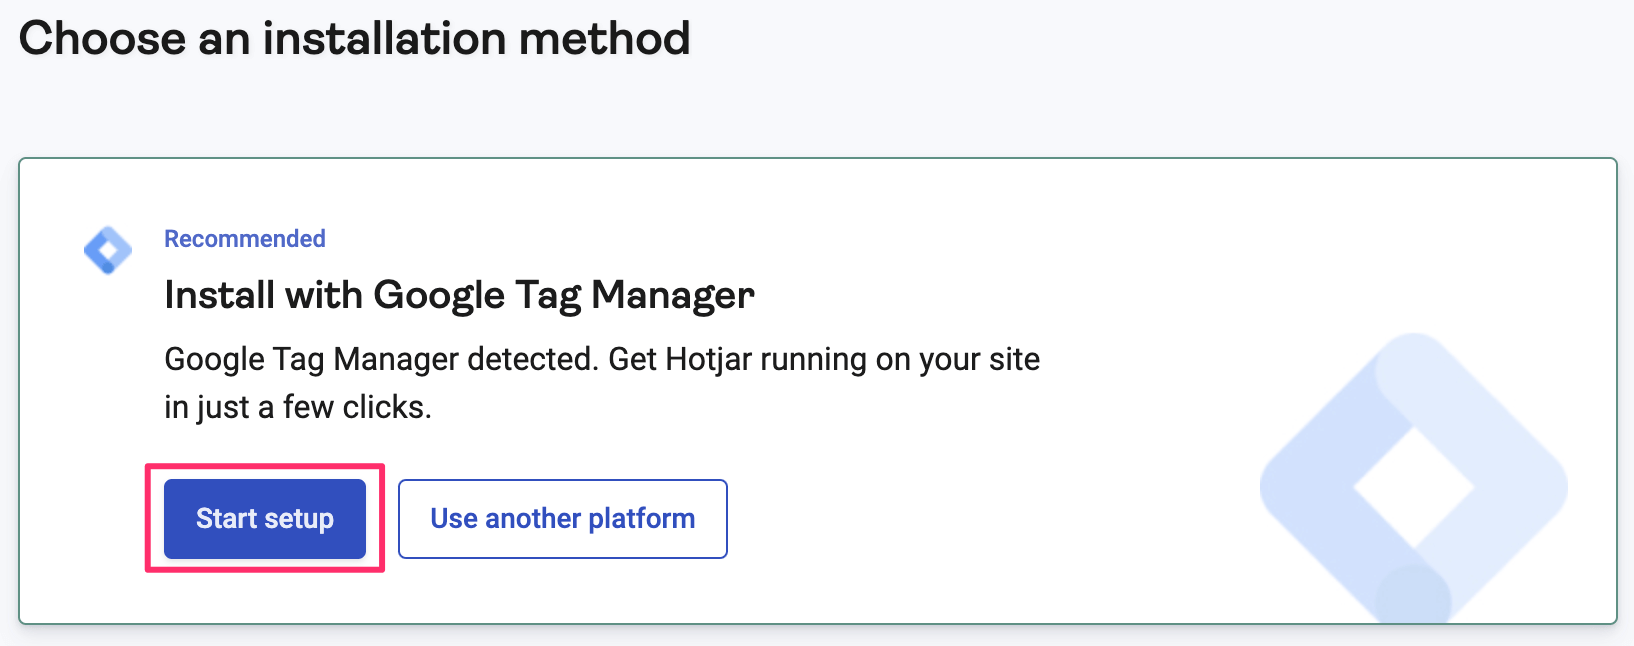
STEP 2: Go to Install with Google Tag Manager and Click on Start setup.
STEP 3: Sign in with a Google account consisting of a GTM container.

STEP 4: For publishing WebMaxy into your GTM, give all the access permissions to WebMaxy and click the continue button.
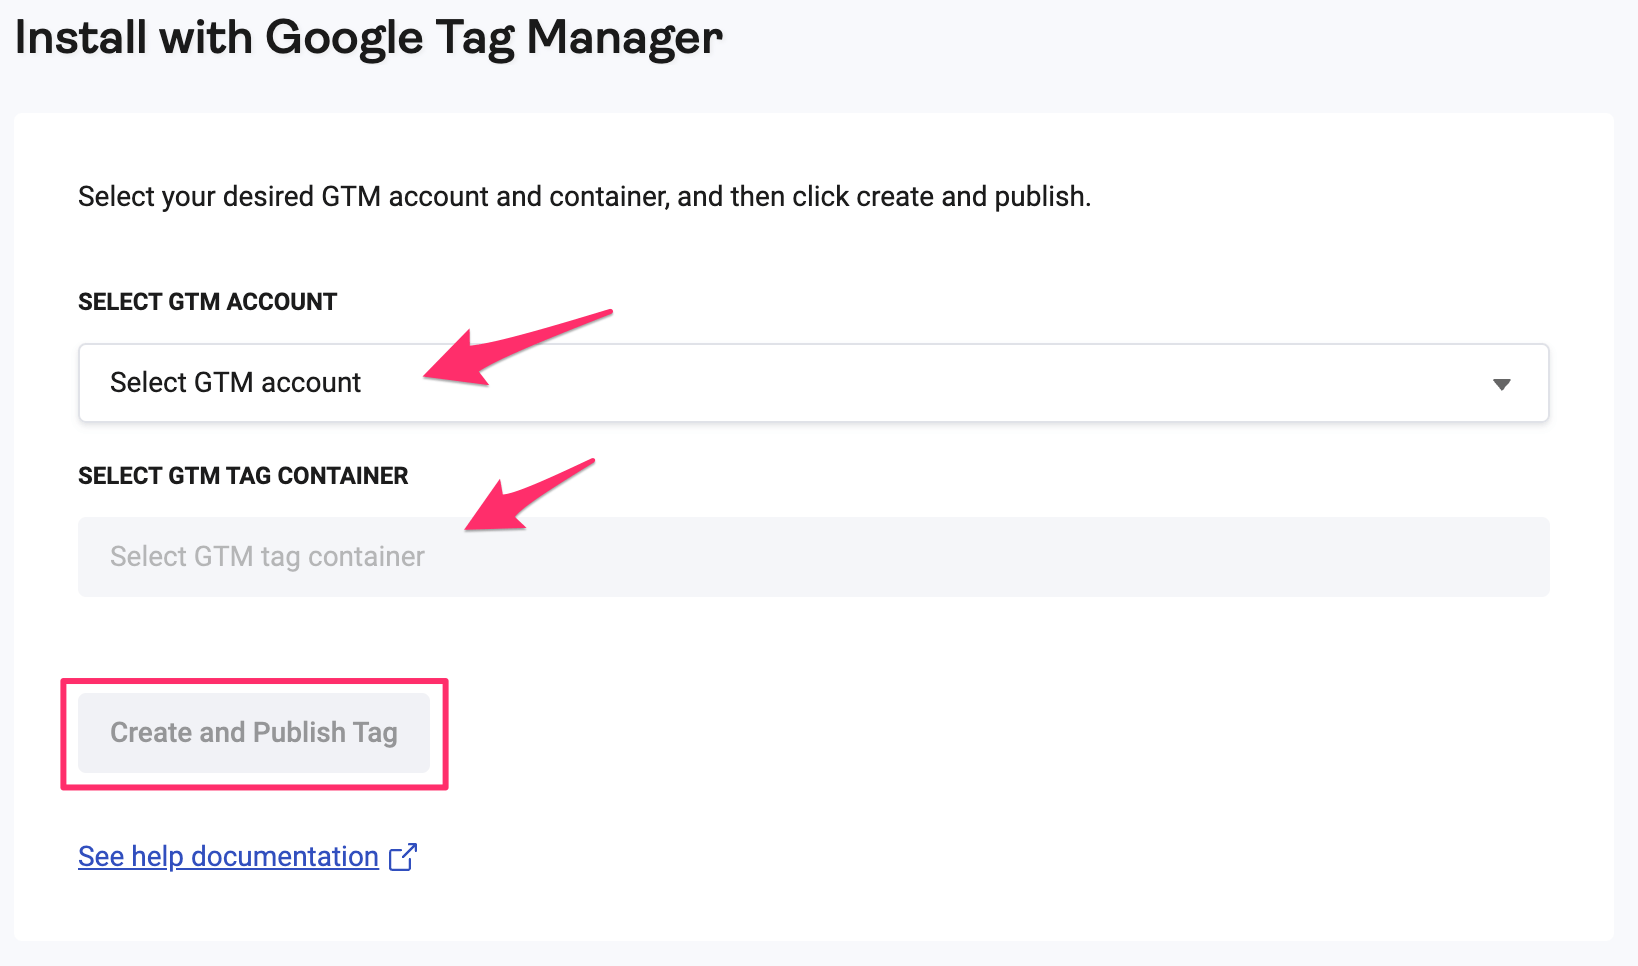
STEP 5: From Install with Google Tag Manager, Choose your GTM account and GTM tag container, and click on Create and Publish Tag button.
STEP 6: Now click Confirm and Create button.
STEP 7: Let Google respond, it may take a few minutes. After that click on Verify Installation.
STEP 8: Now you have to simply follow the Verify Installation prompt.
You will receive a message confirming about successful installation.
WebMaxy Tracking Code tag in Google Tag Manager
You can install the WebMaxy tracking code from inside the Google Tag Manager with the help of the below steps.
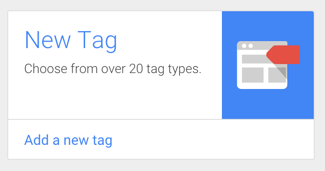
STEP 1: Go to your Google Tag Manager dashboard, and click Add a new tag.
STEP 2: Click the tag icon, from the list choose the WebMaxy Tracking Code.
STEP 3: In the text placeholder enter your WebMaxy app ID.
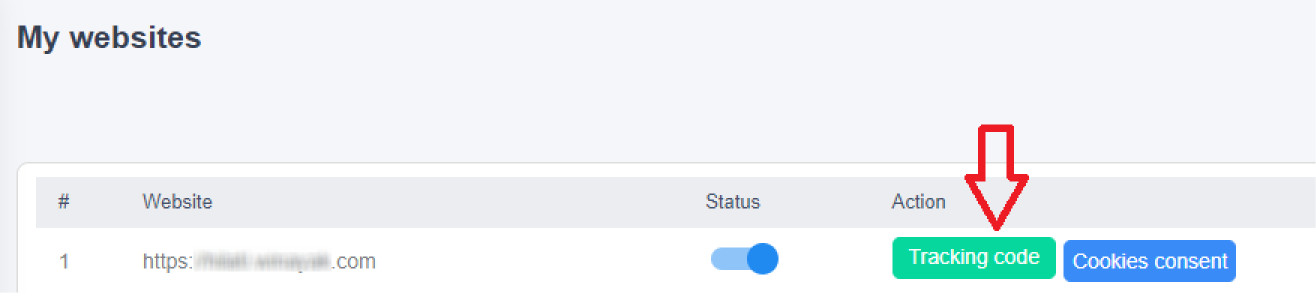
To get your WebMaxy app ID, go to the site’s My websites page, and click the Tracking Code.

STEP 4: To control WebMaxy, set up a trigger.
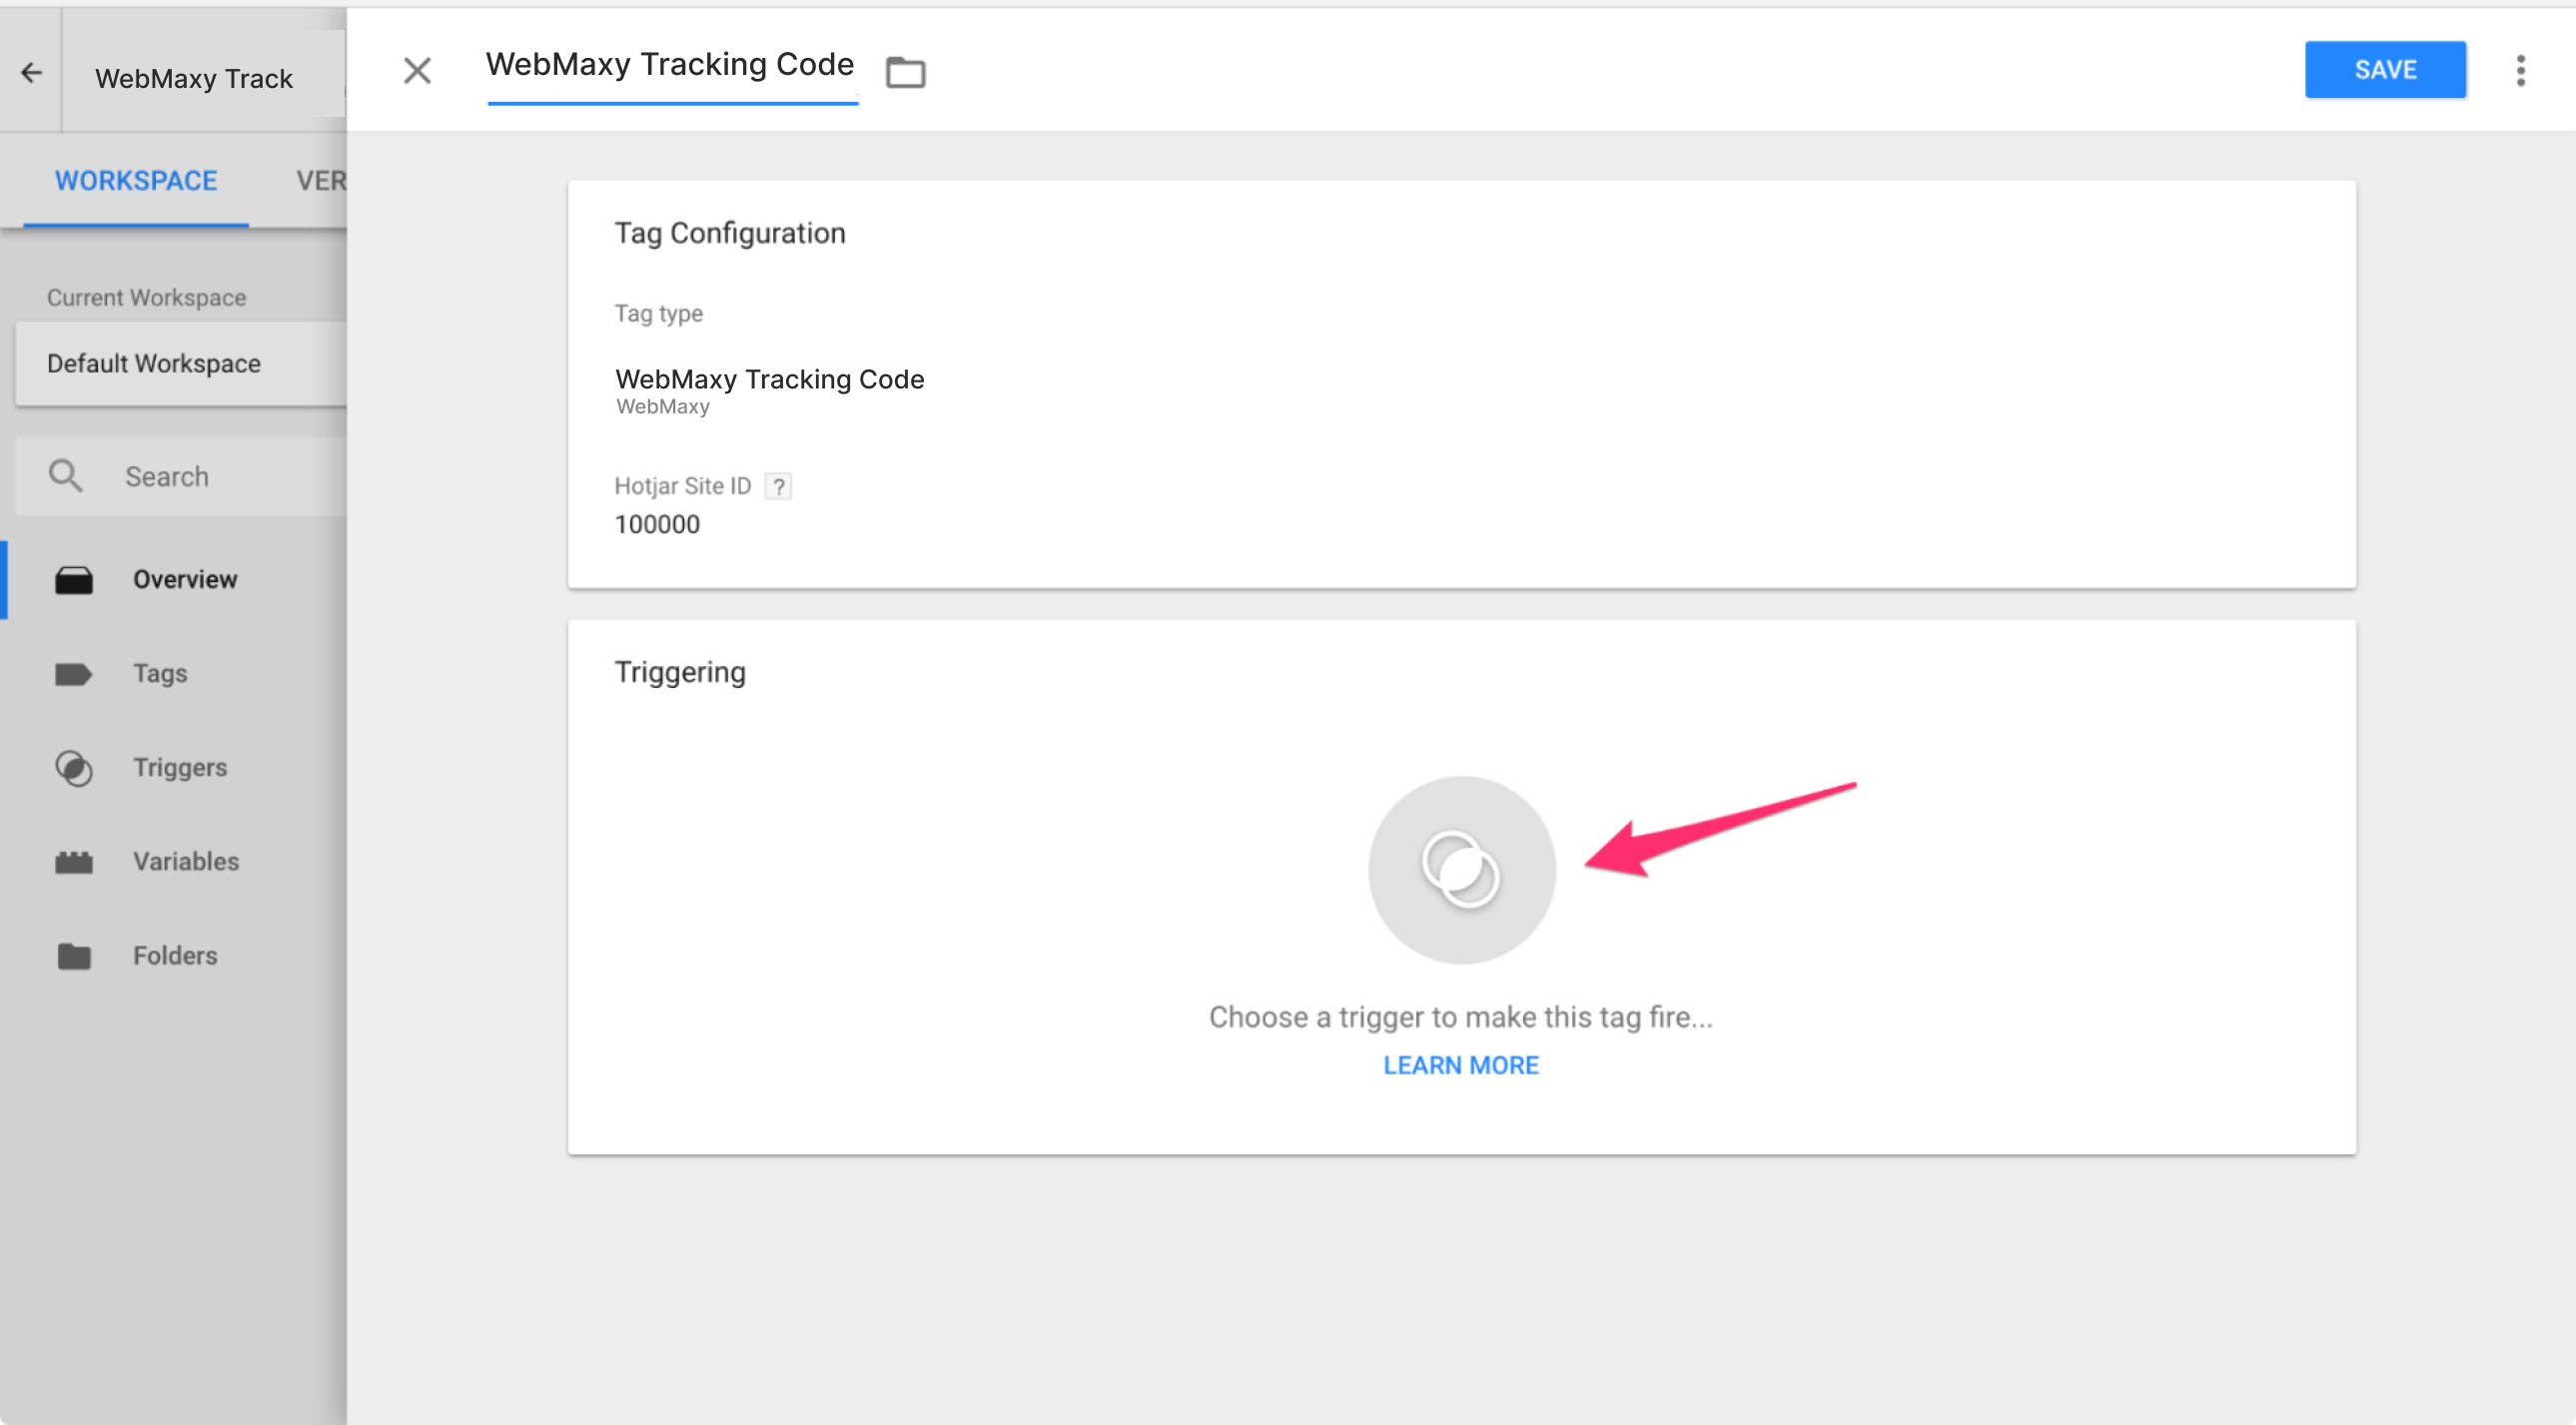
From the Triggering area, choose which pages you want the Webmaxy Tracking Code should display.
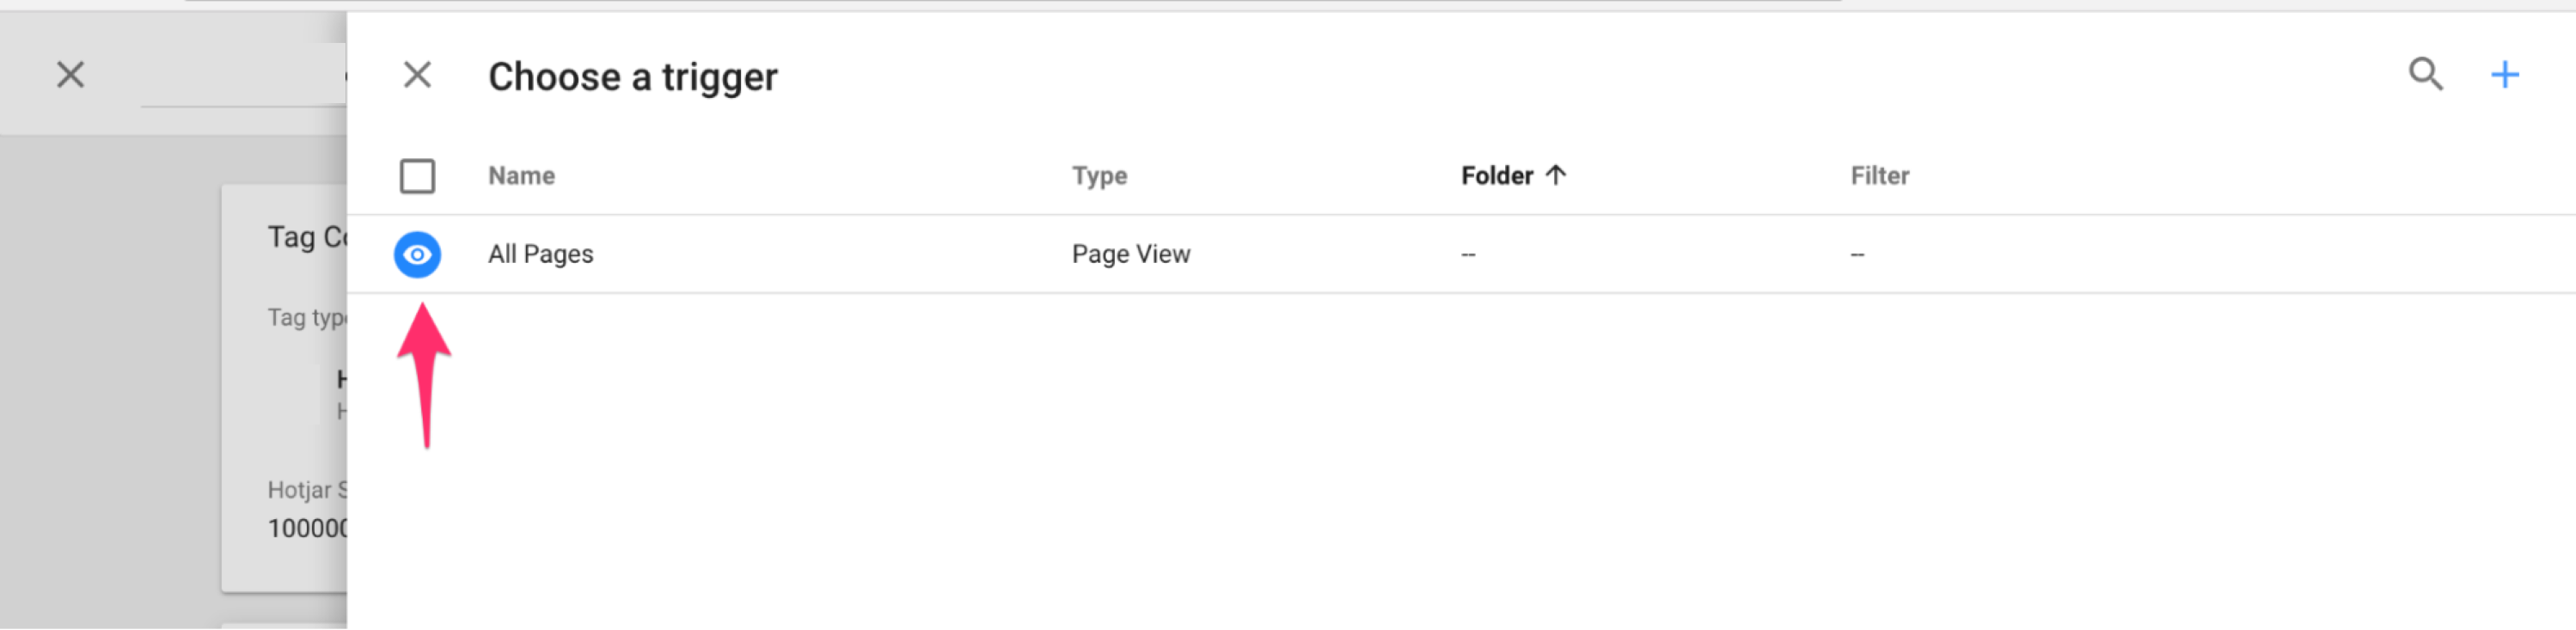
STEP 5: You may also choose All Pages for the trigger.
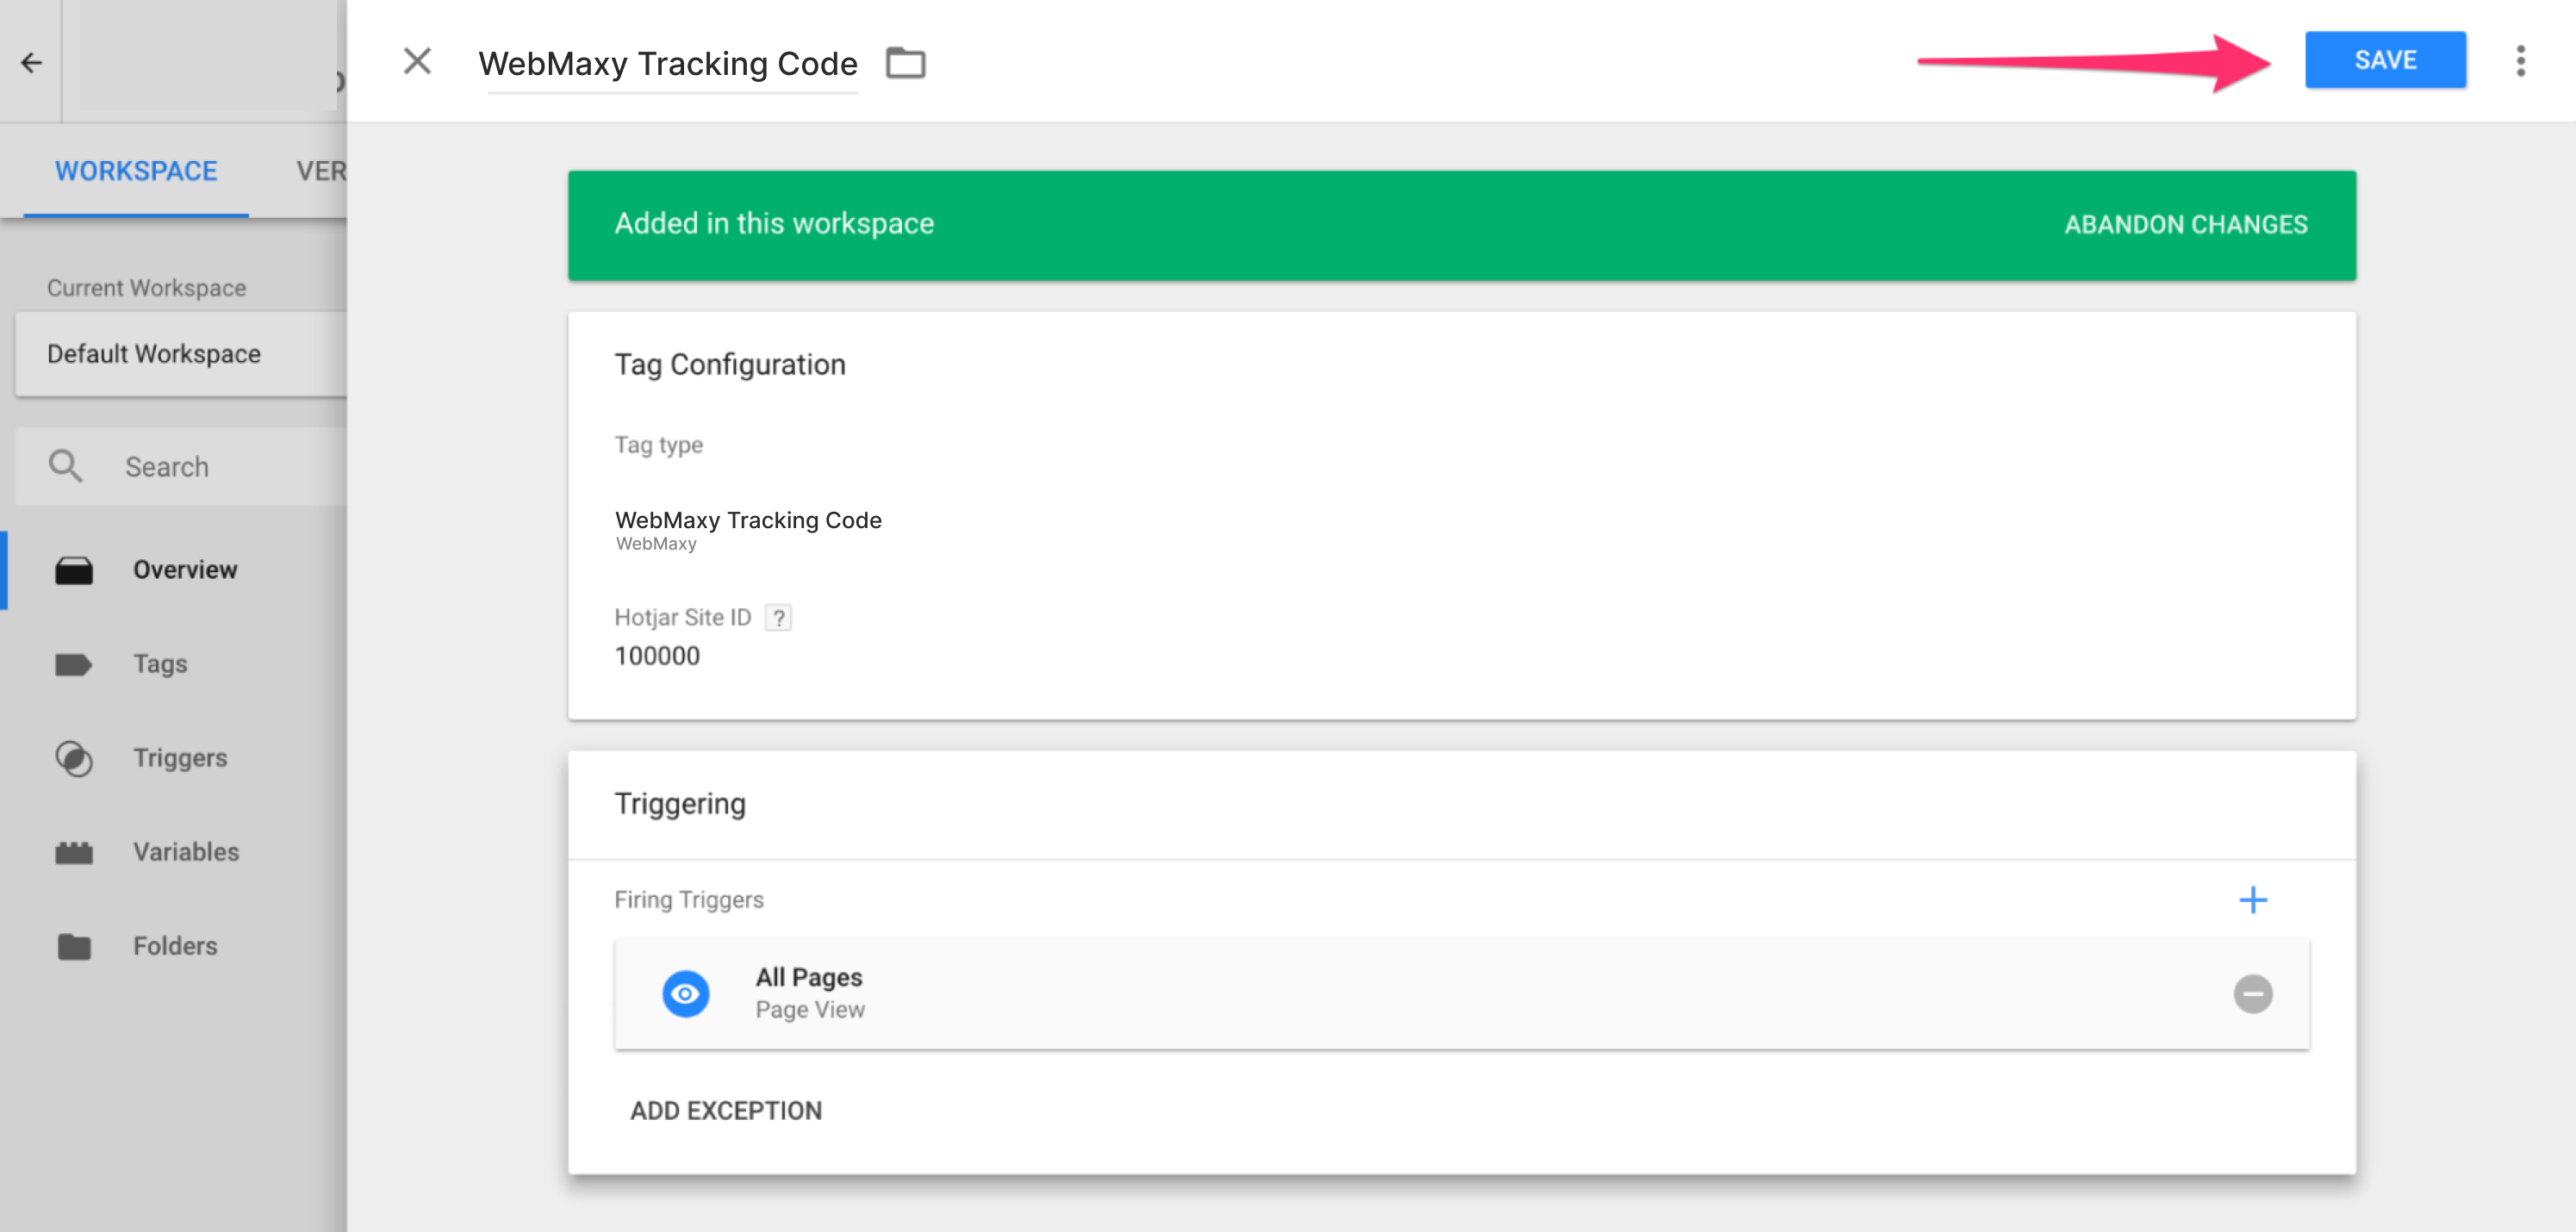
STEP 6: If you are done with all the above, you can save your workspace.
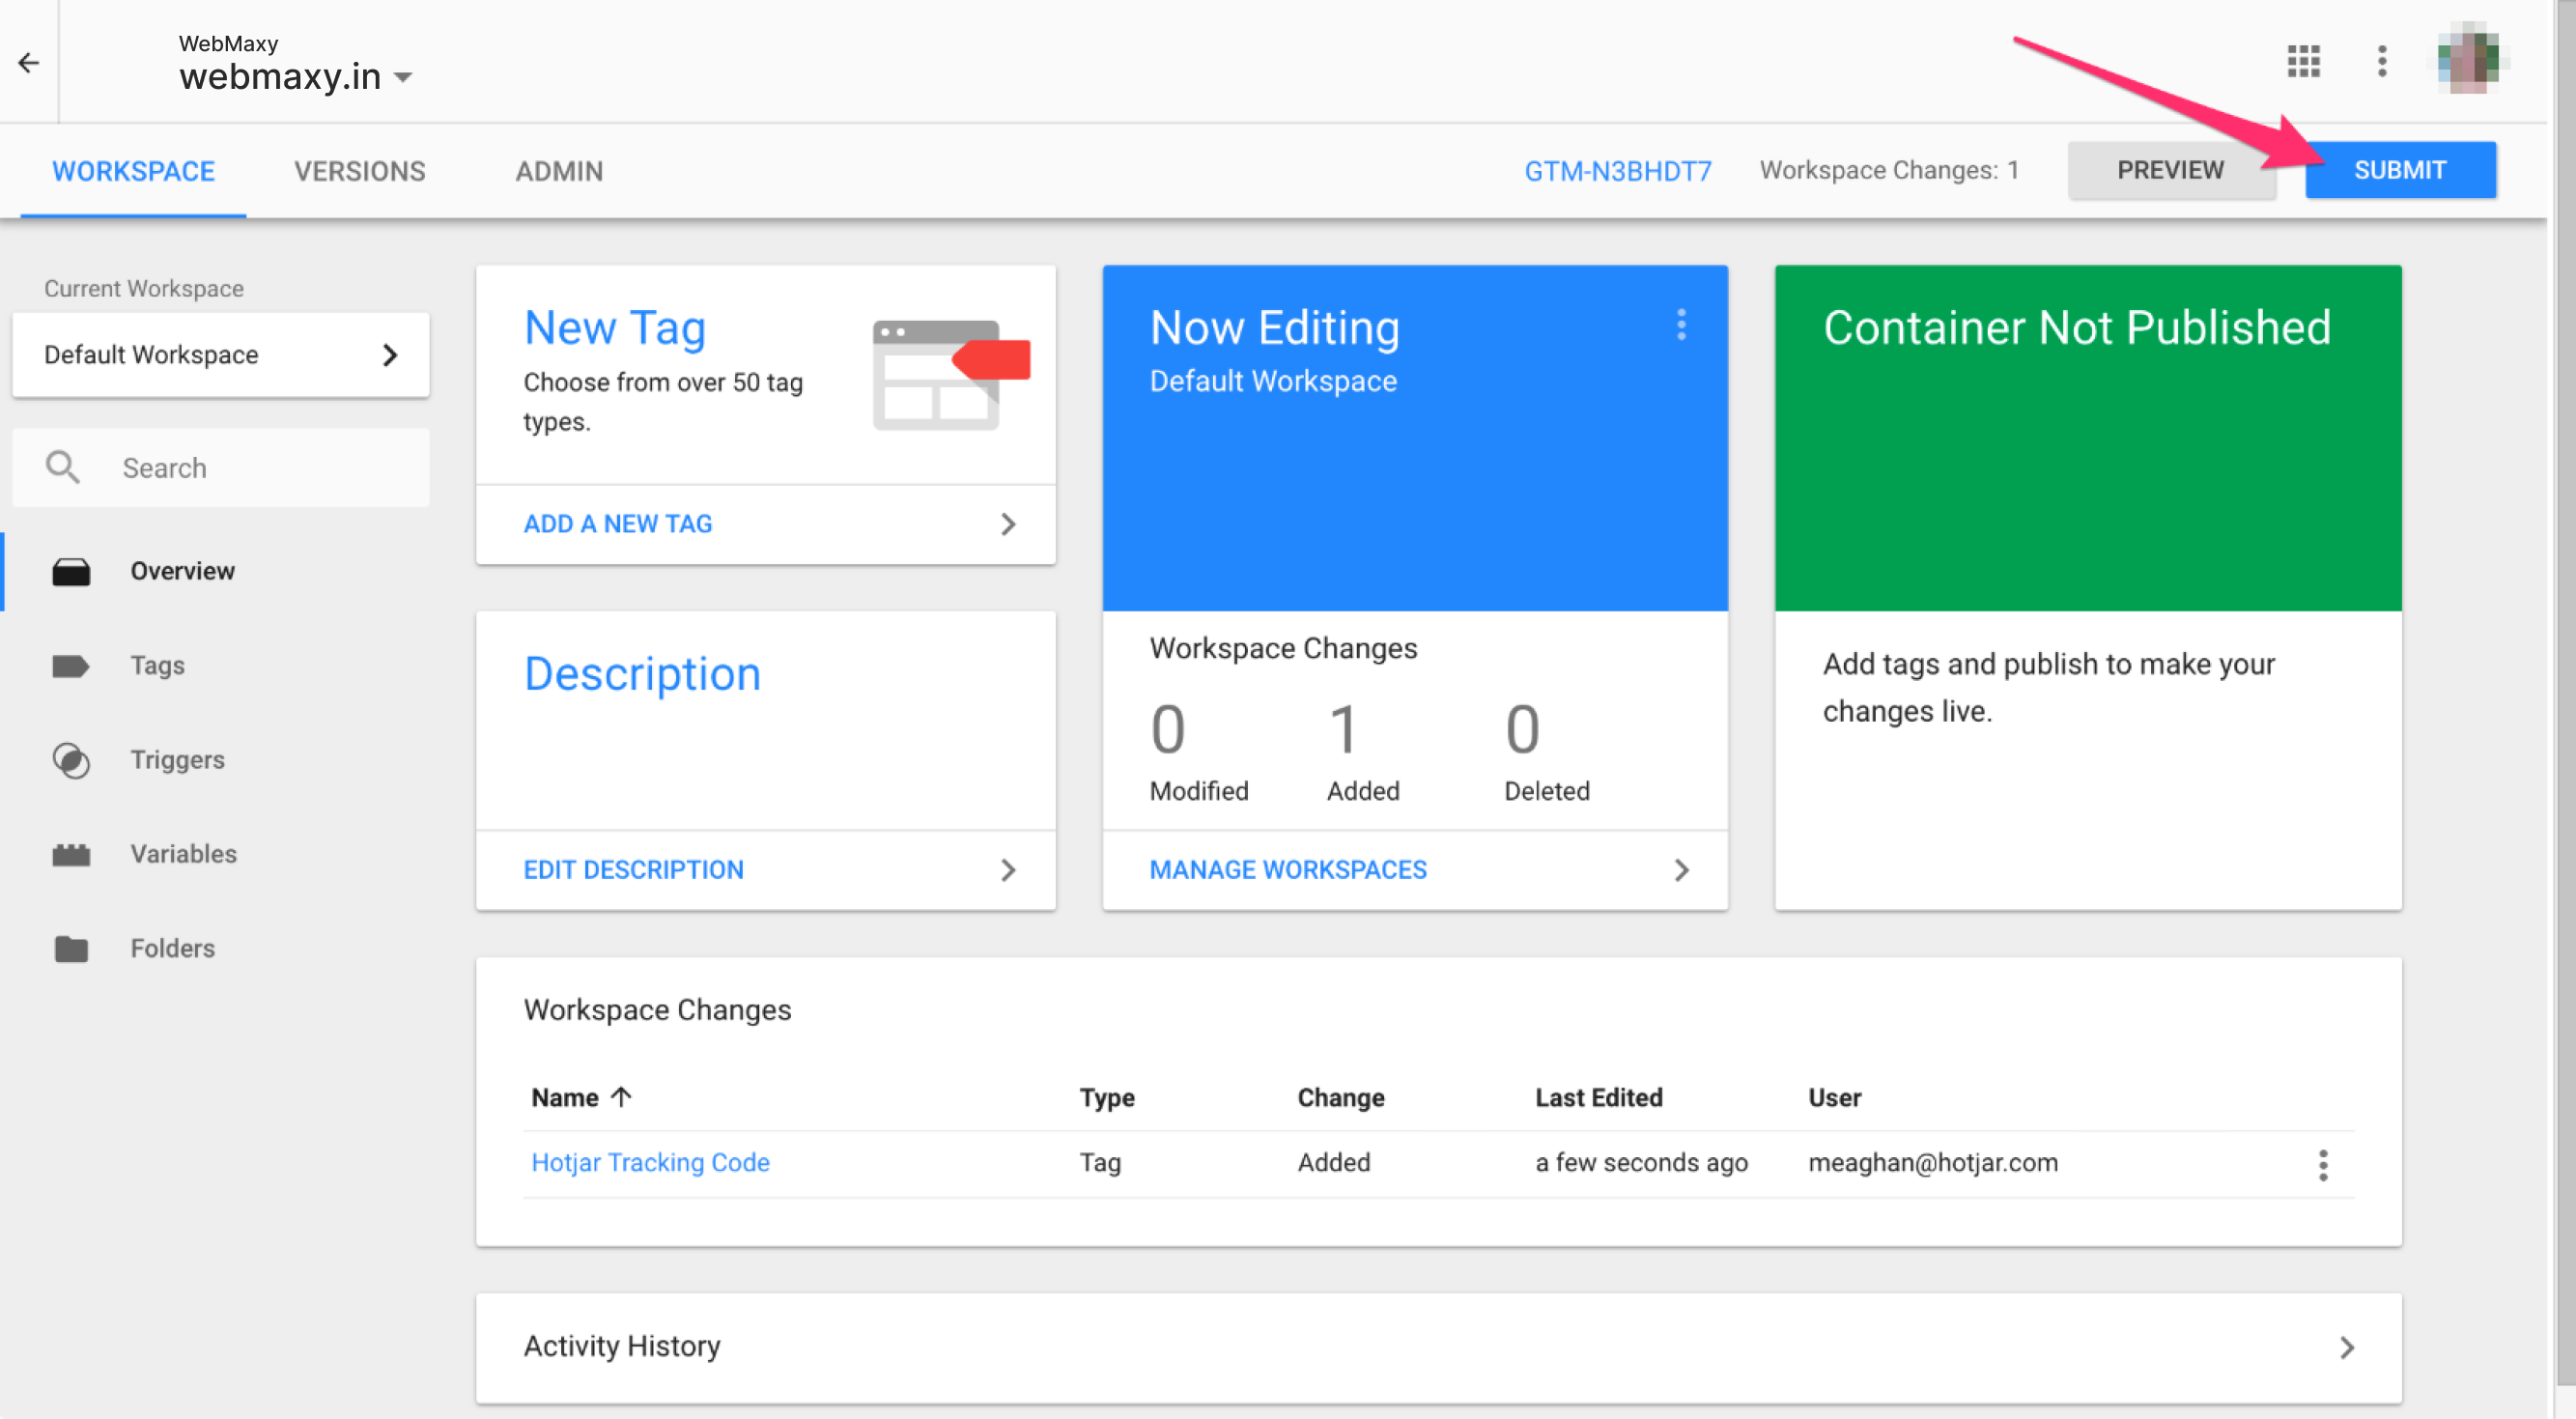
STEP 7: After saving the workplace, click the Submit button at the top right of the page.
STEP 8: Finally, to publish the tag, click on the Publish button.
STEP 9: WebMaxy will auto-detect the verification process.
WebMaxy Tracking Code on GTM as a Custom HTML tag
Follow the below steps to install WebMaxy Tracking Code on GTM as a Custom HTML tag.
STEP 1: Go to the My websites page in WebMaxy.
Click the Tracking Code button beside the website which you want to capture data.
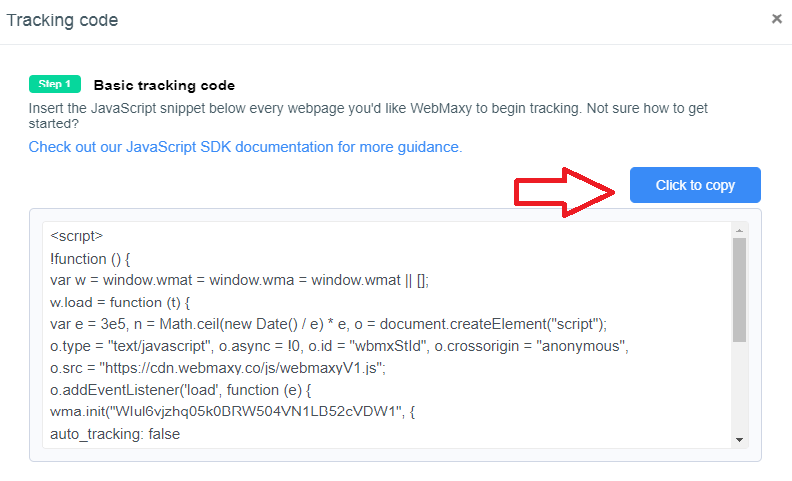
STEP 2: Go to Basic tracking code and click on the Click to Copy.
STEP 4: Go to Google Tag Manager, and click on the Add a New Tag.

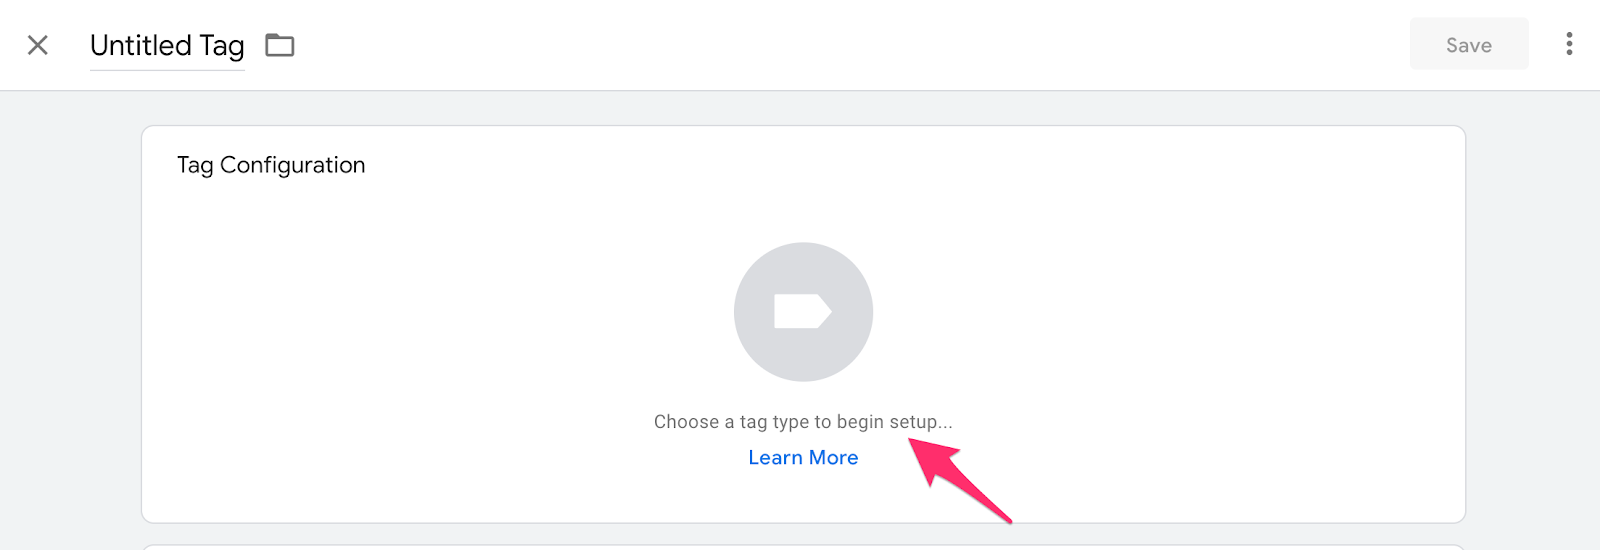
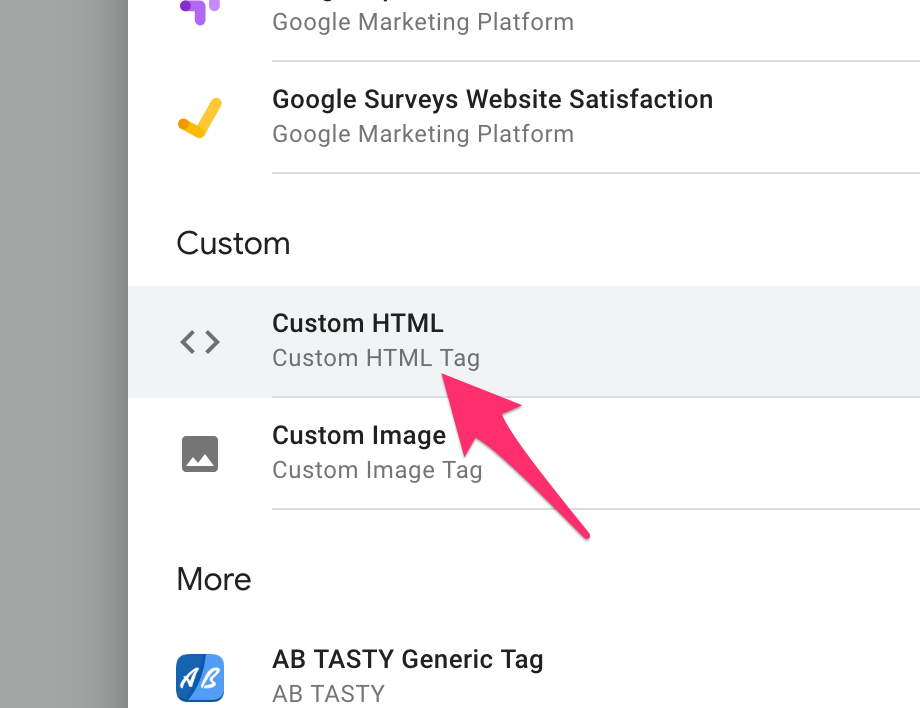
STEP 5: Click on Choose a tag type to begin setup… text.
STEP 6: From the list, choose Custom HTML.
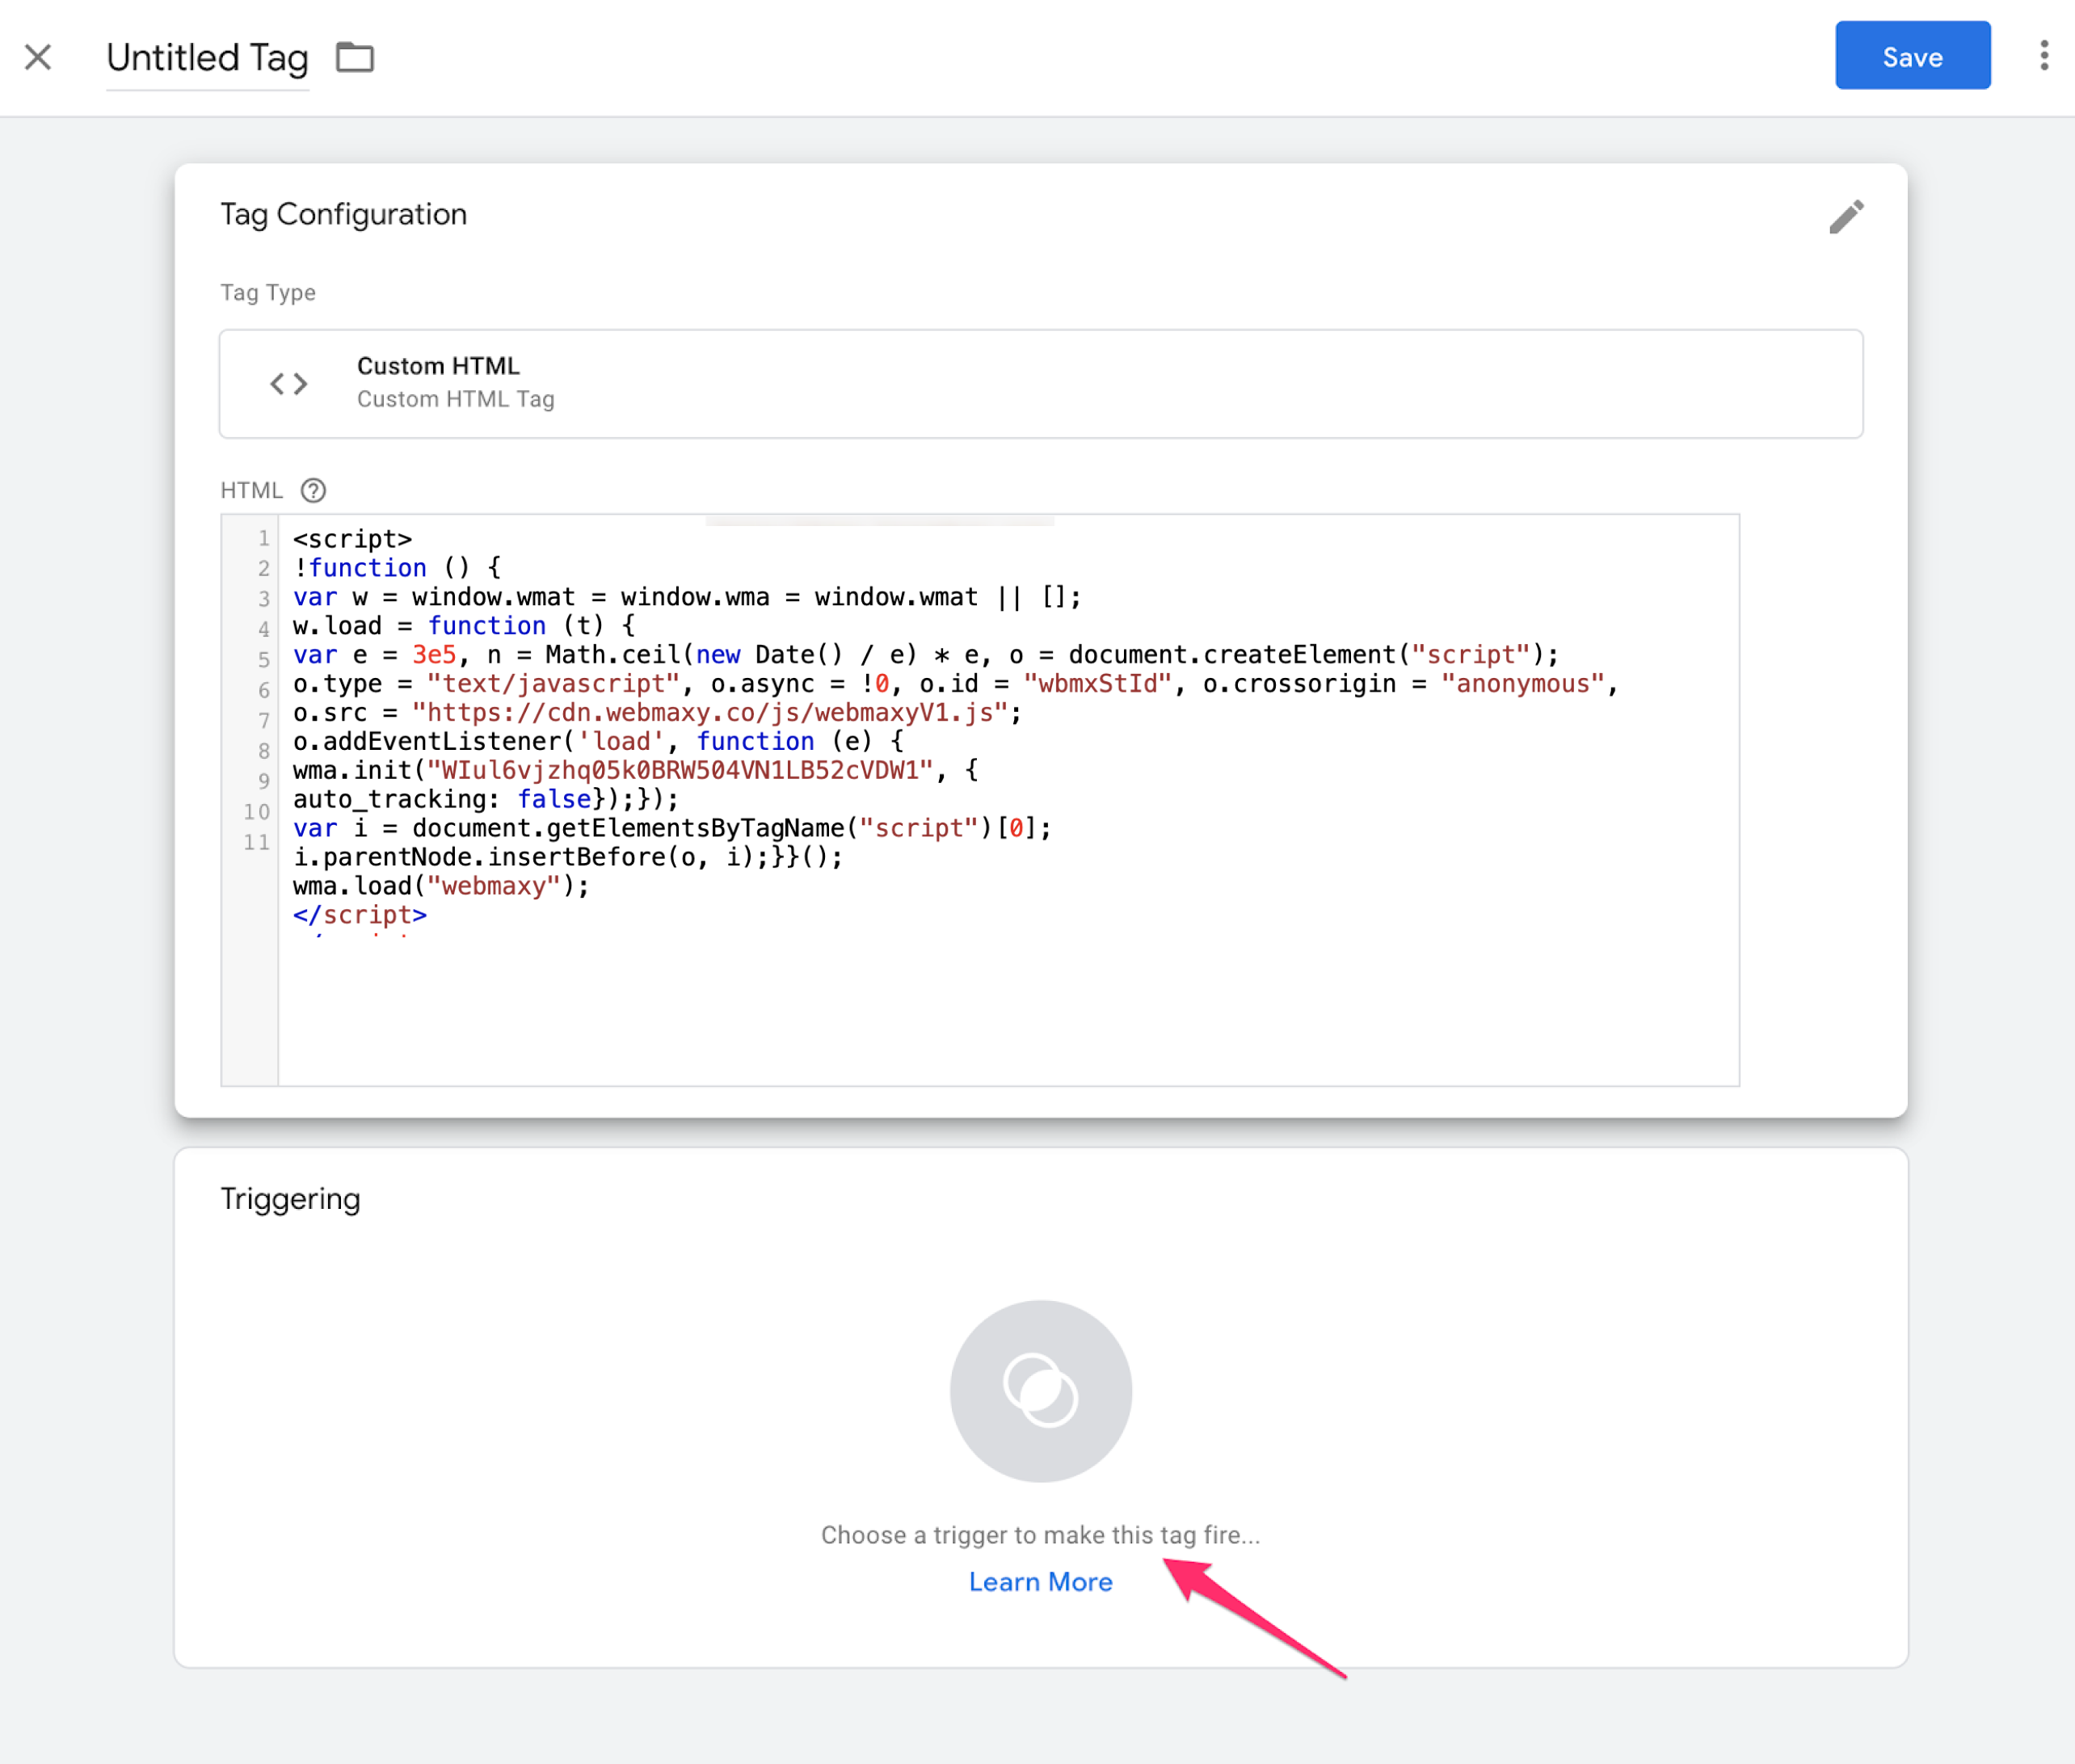
STEP 7: Now paste the copied Webmaxy code into the text field.
STEP 8: Select the Choose a trigger to make this tag fire…
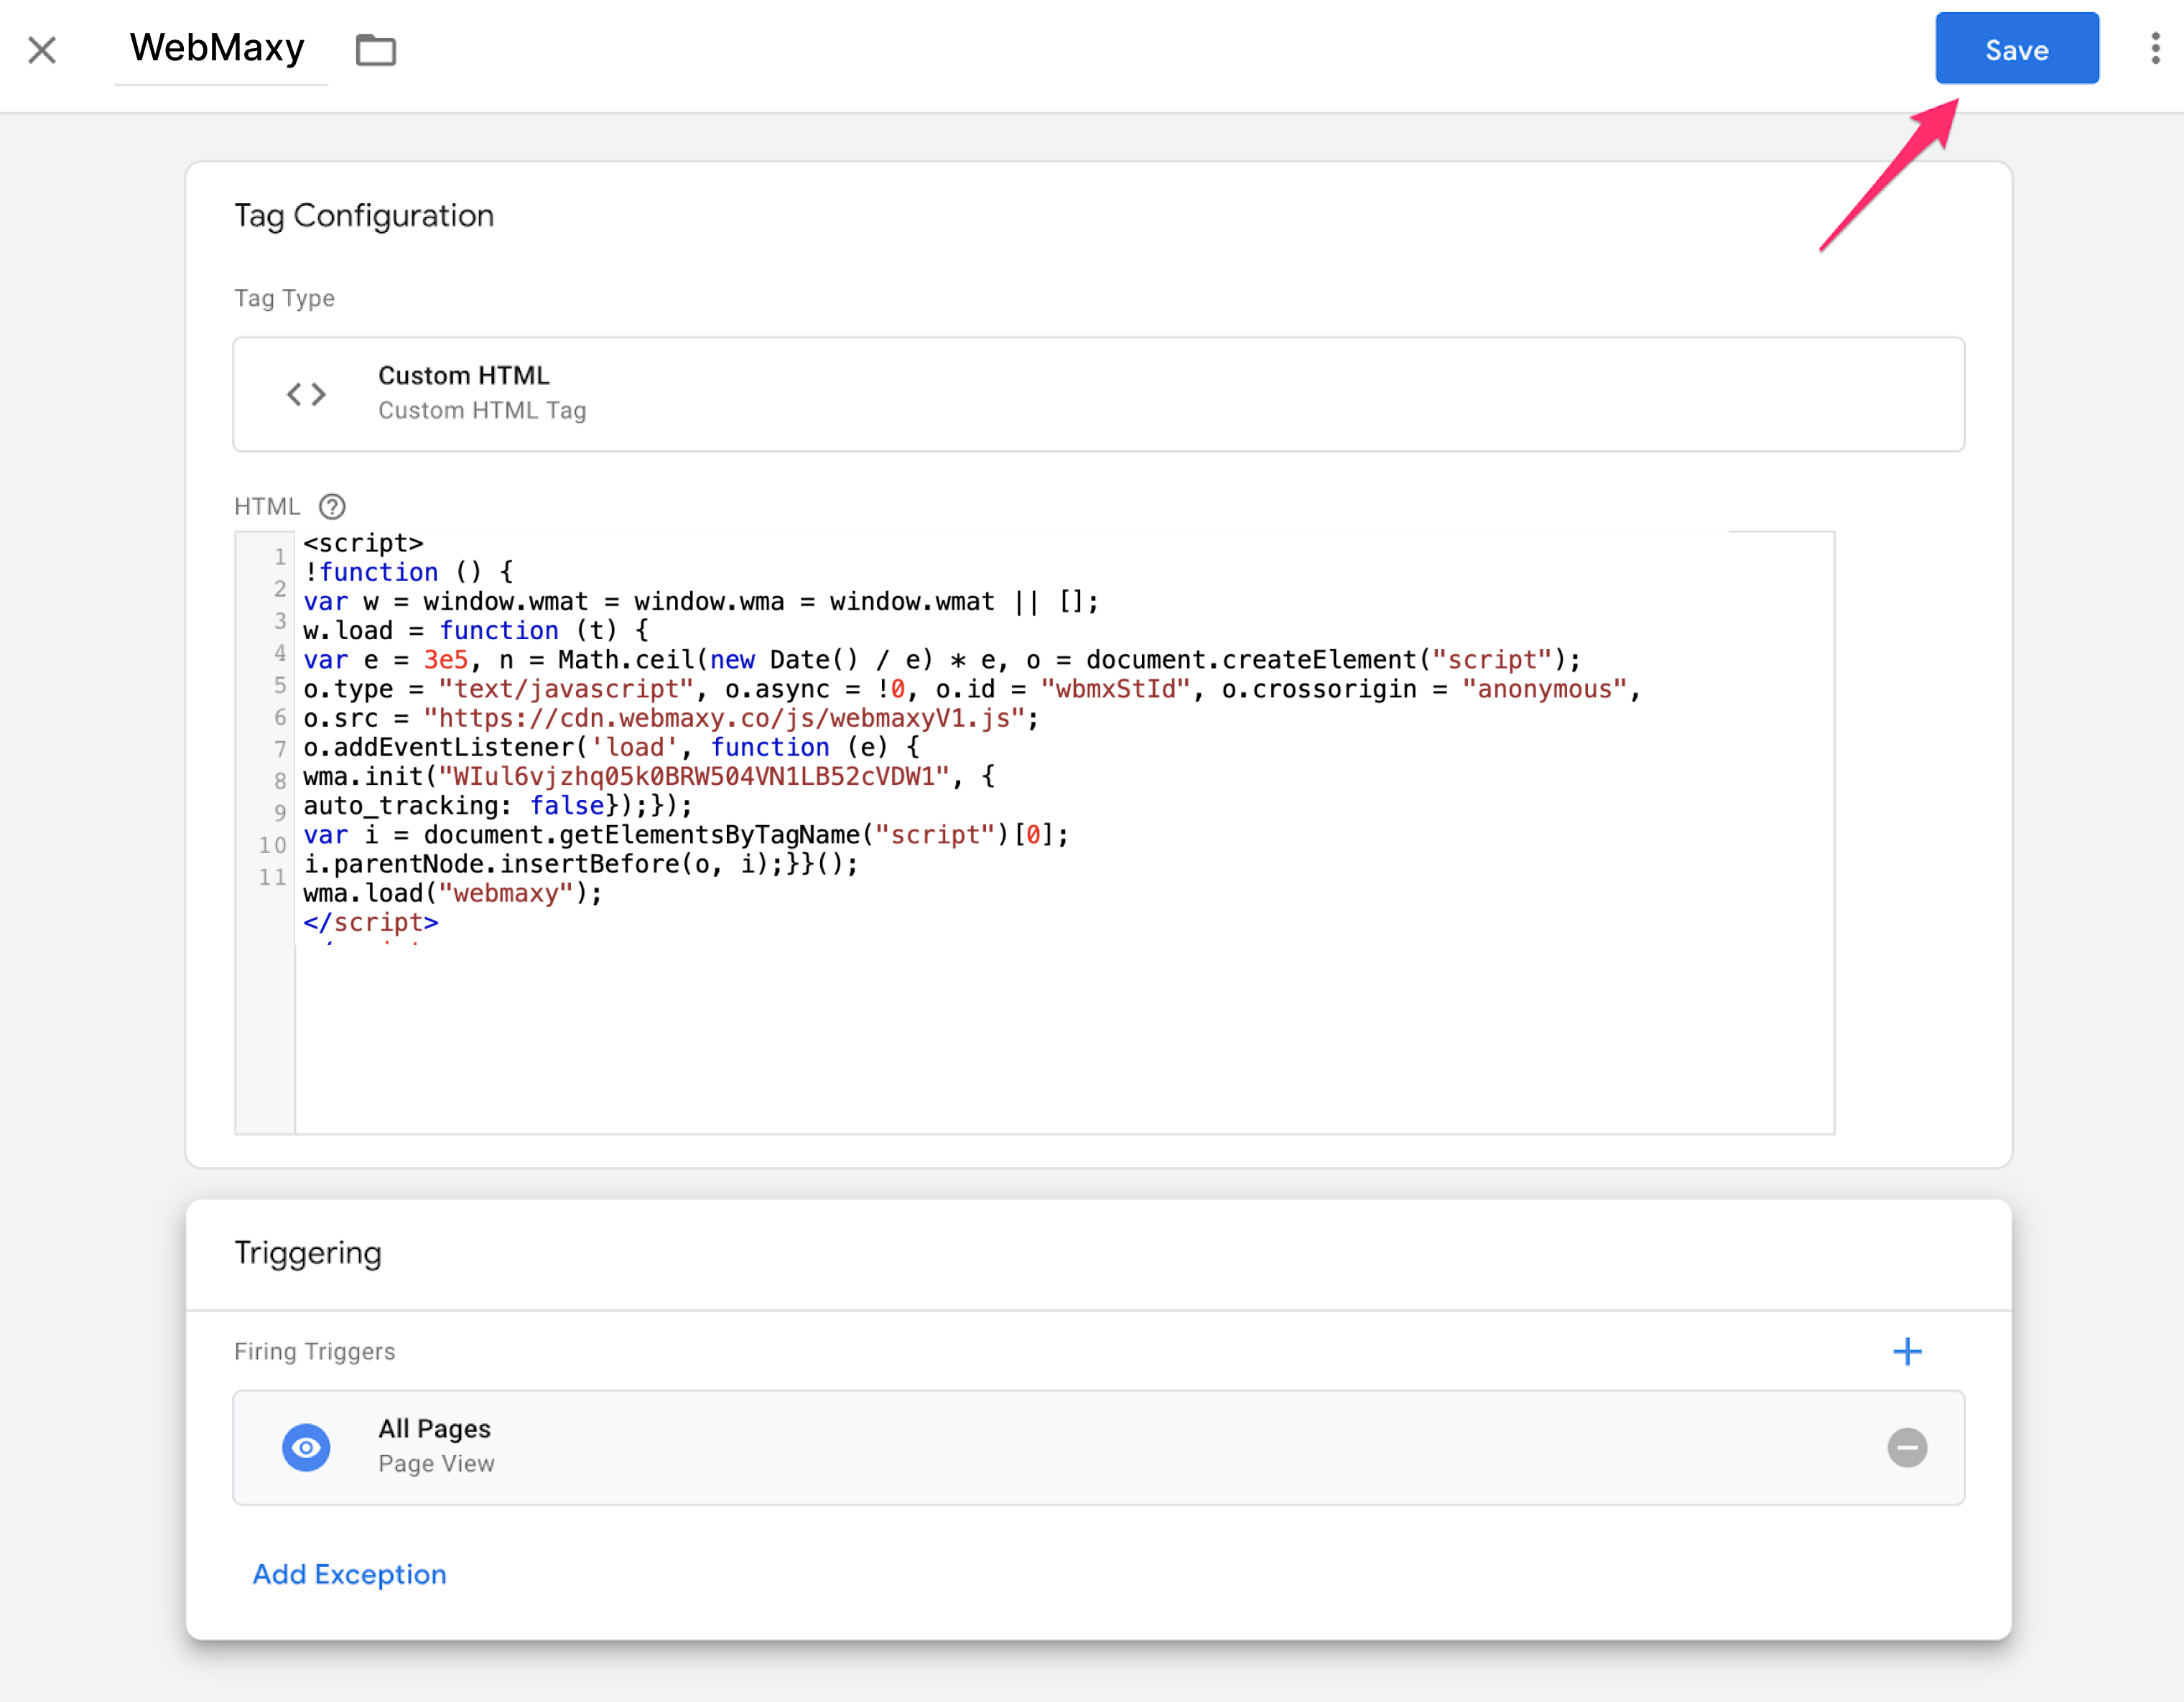
STEP 9: Click on All Pages.

NOTE- Webmaxy won’t work correctly if any other trigger is chosen.
STEP 10: Enter the tag and click the Save.
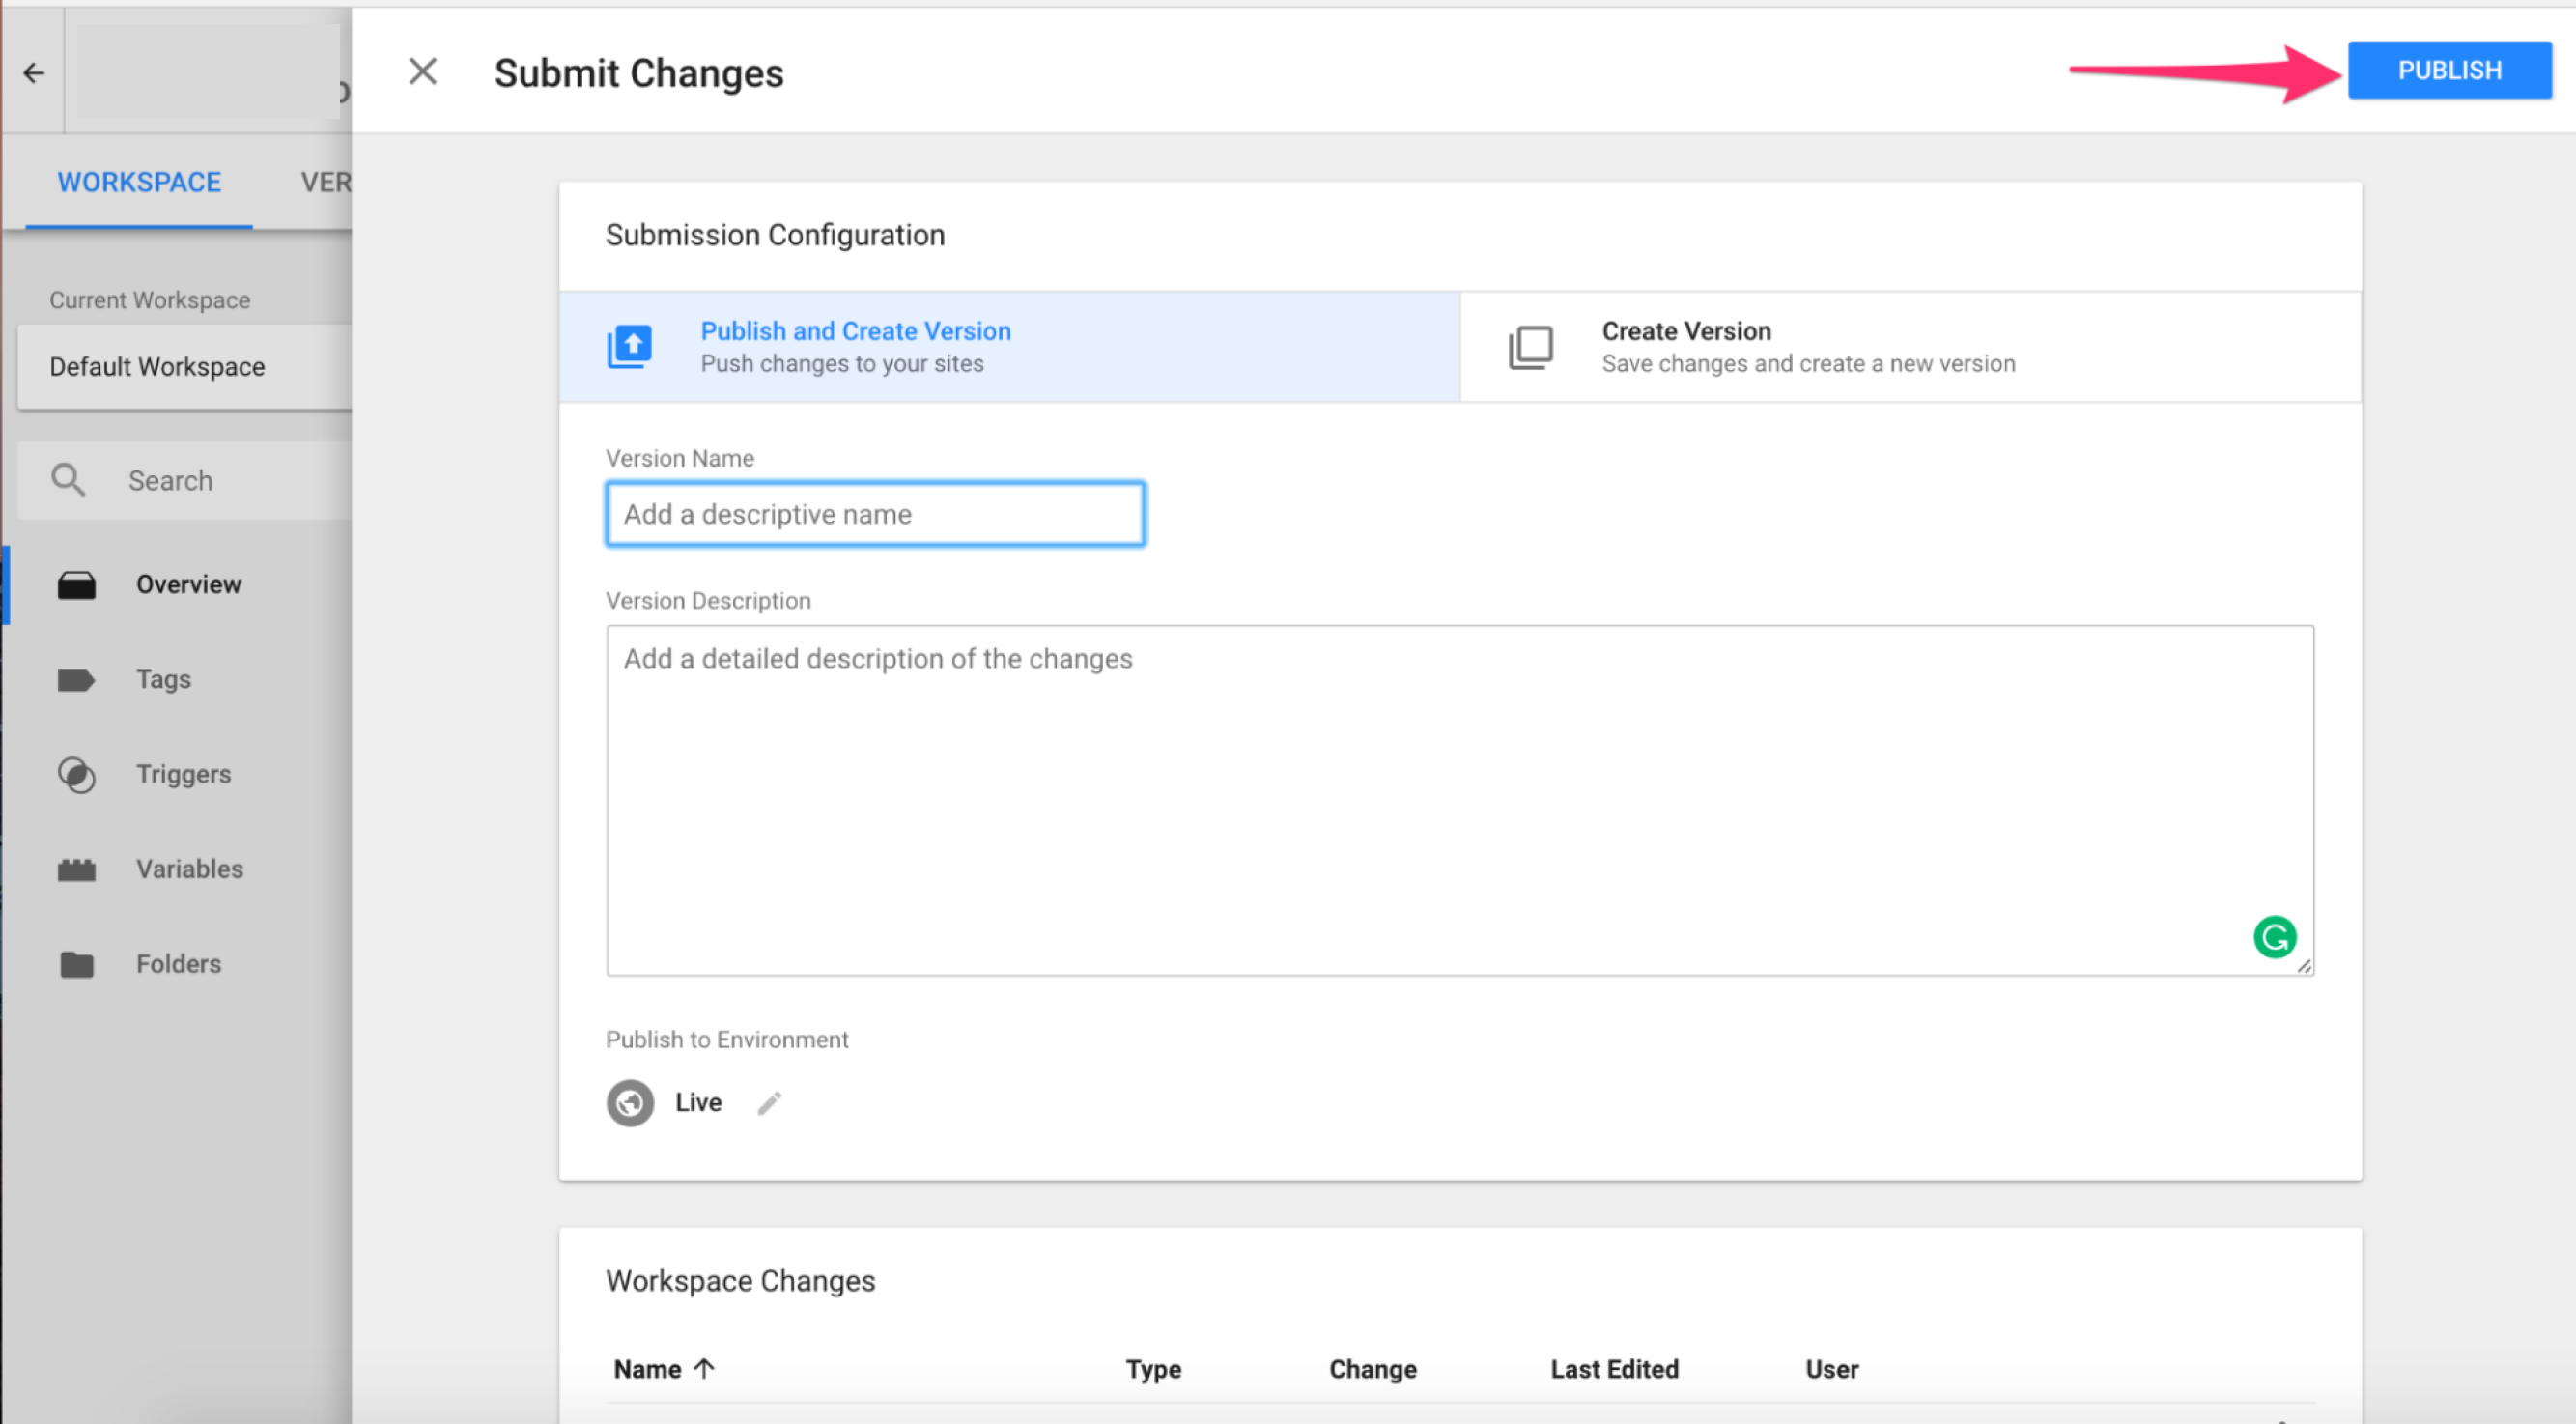
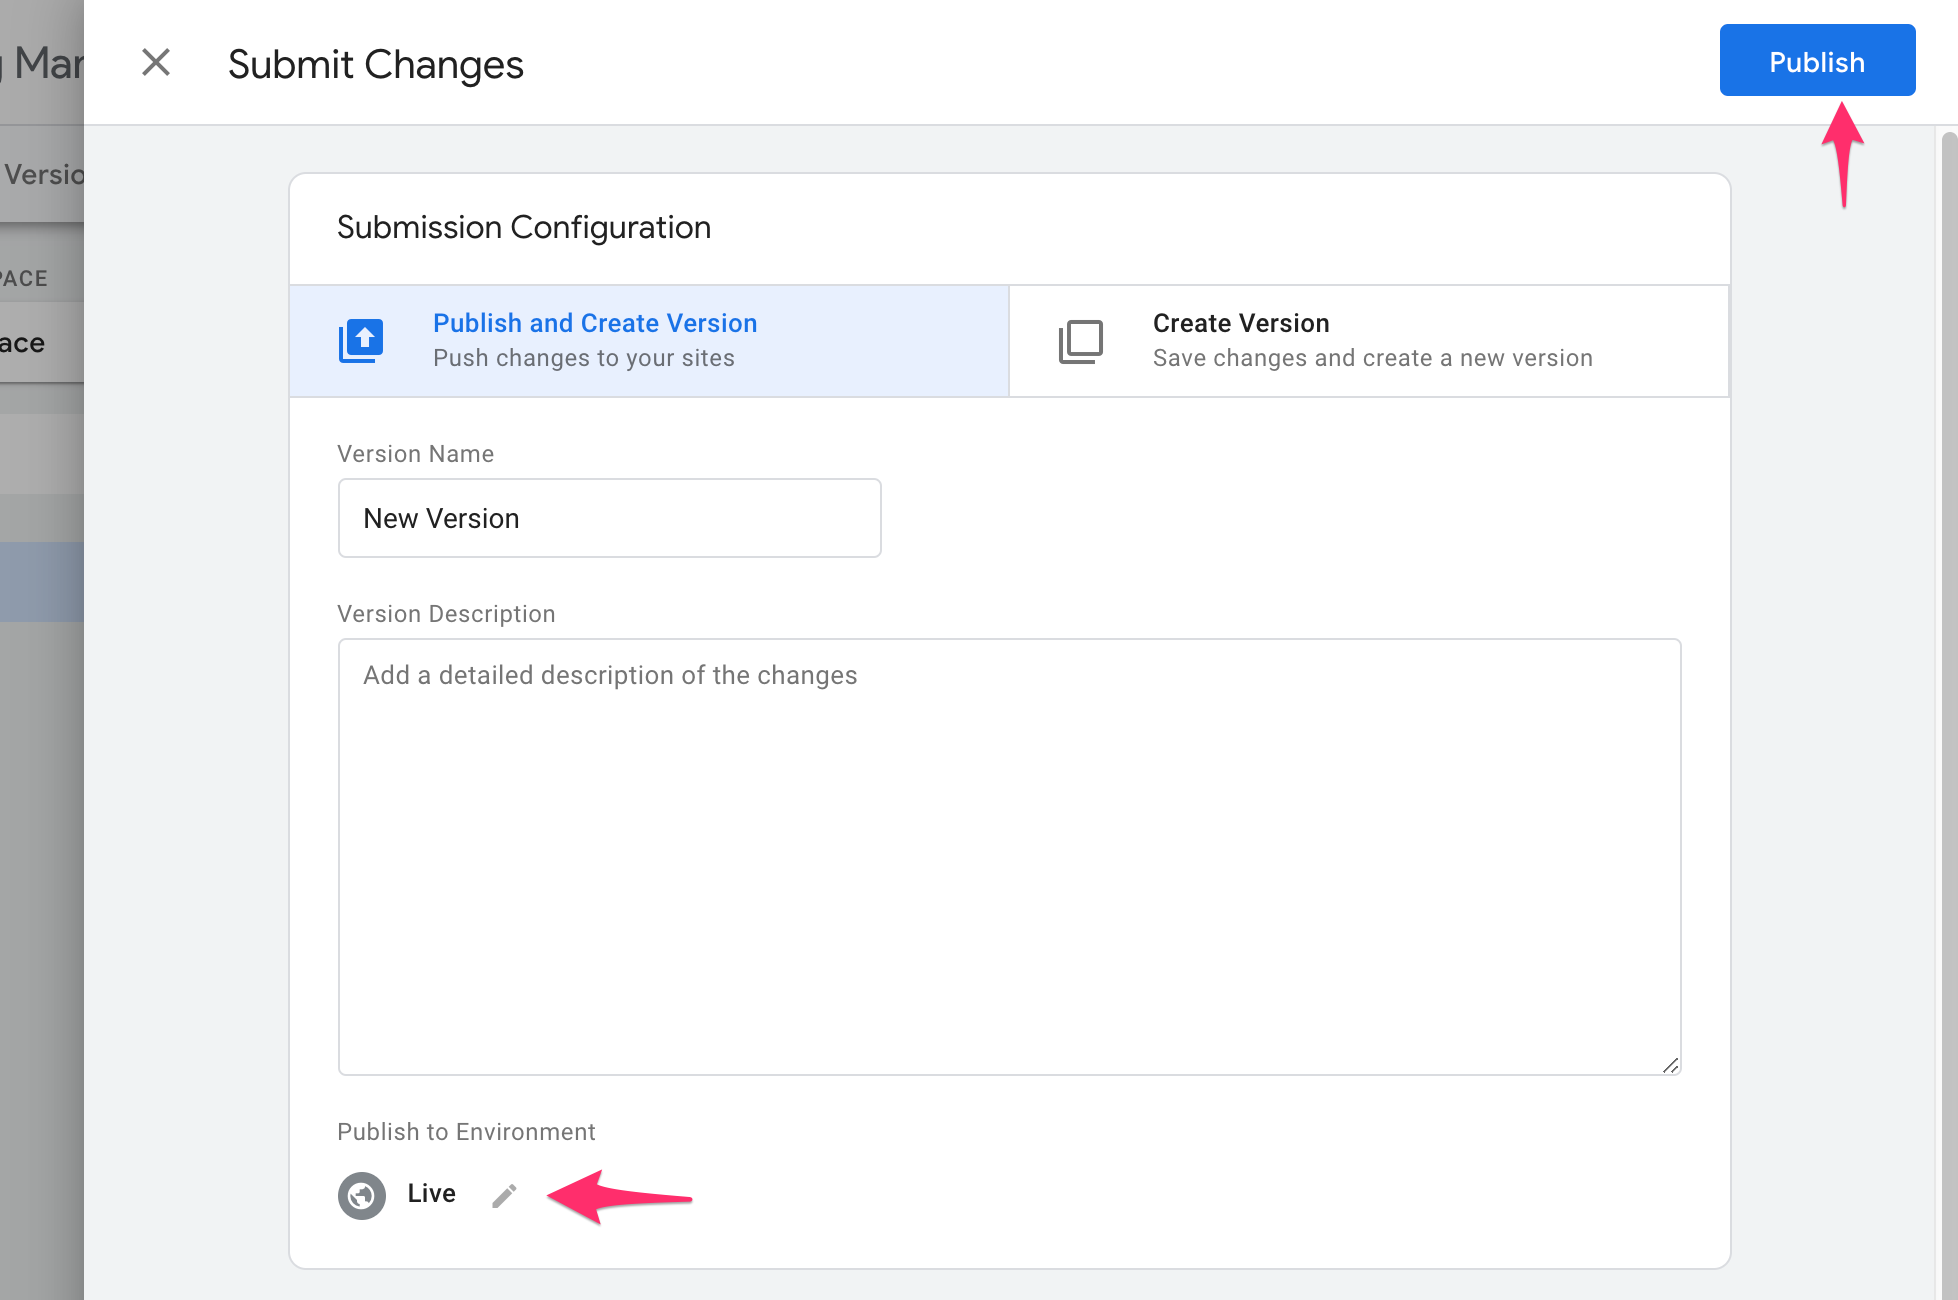
STEP 11: If the above steps are done correctly then Submit your changes.
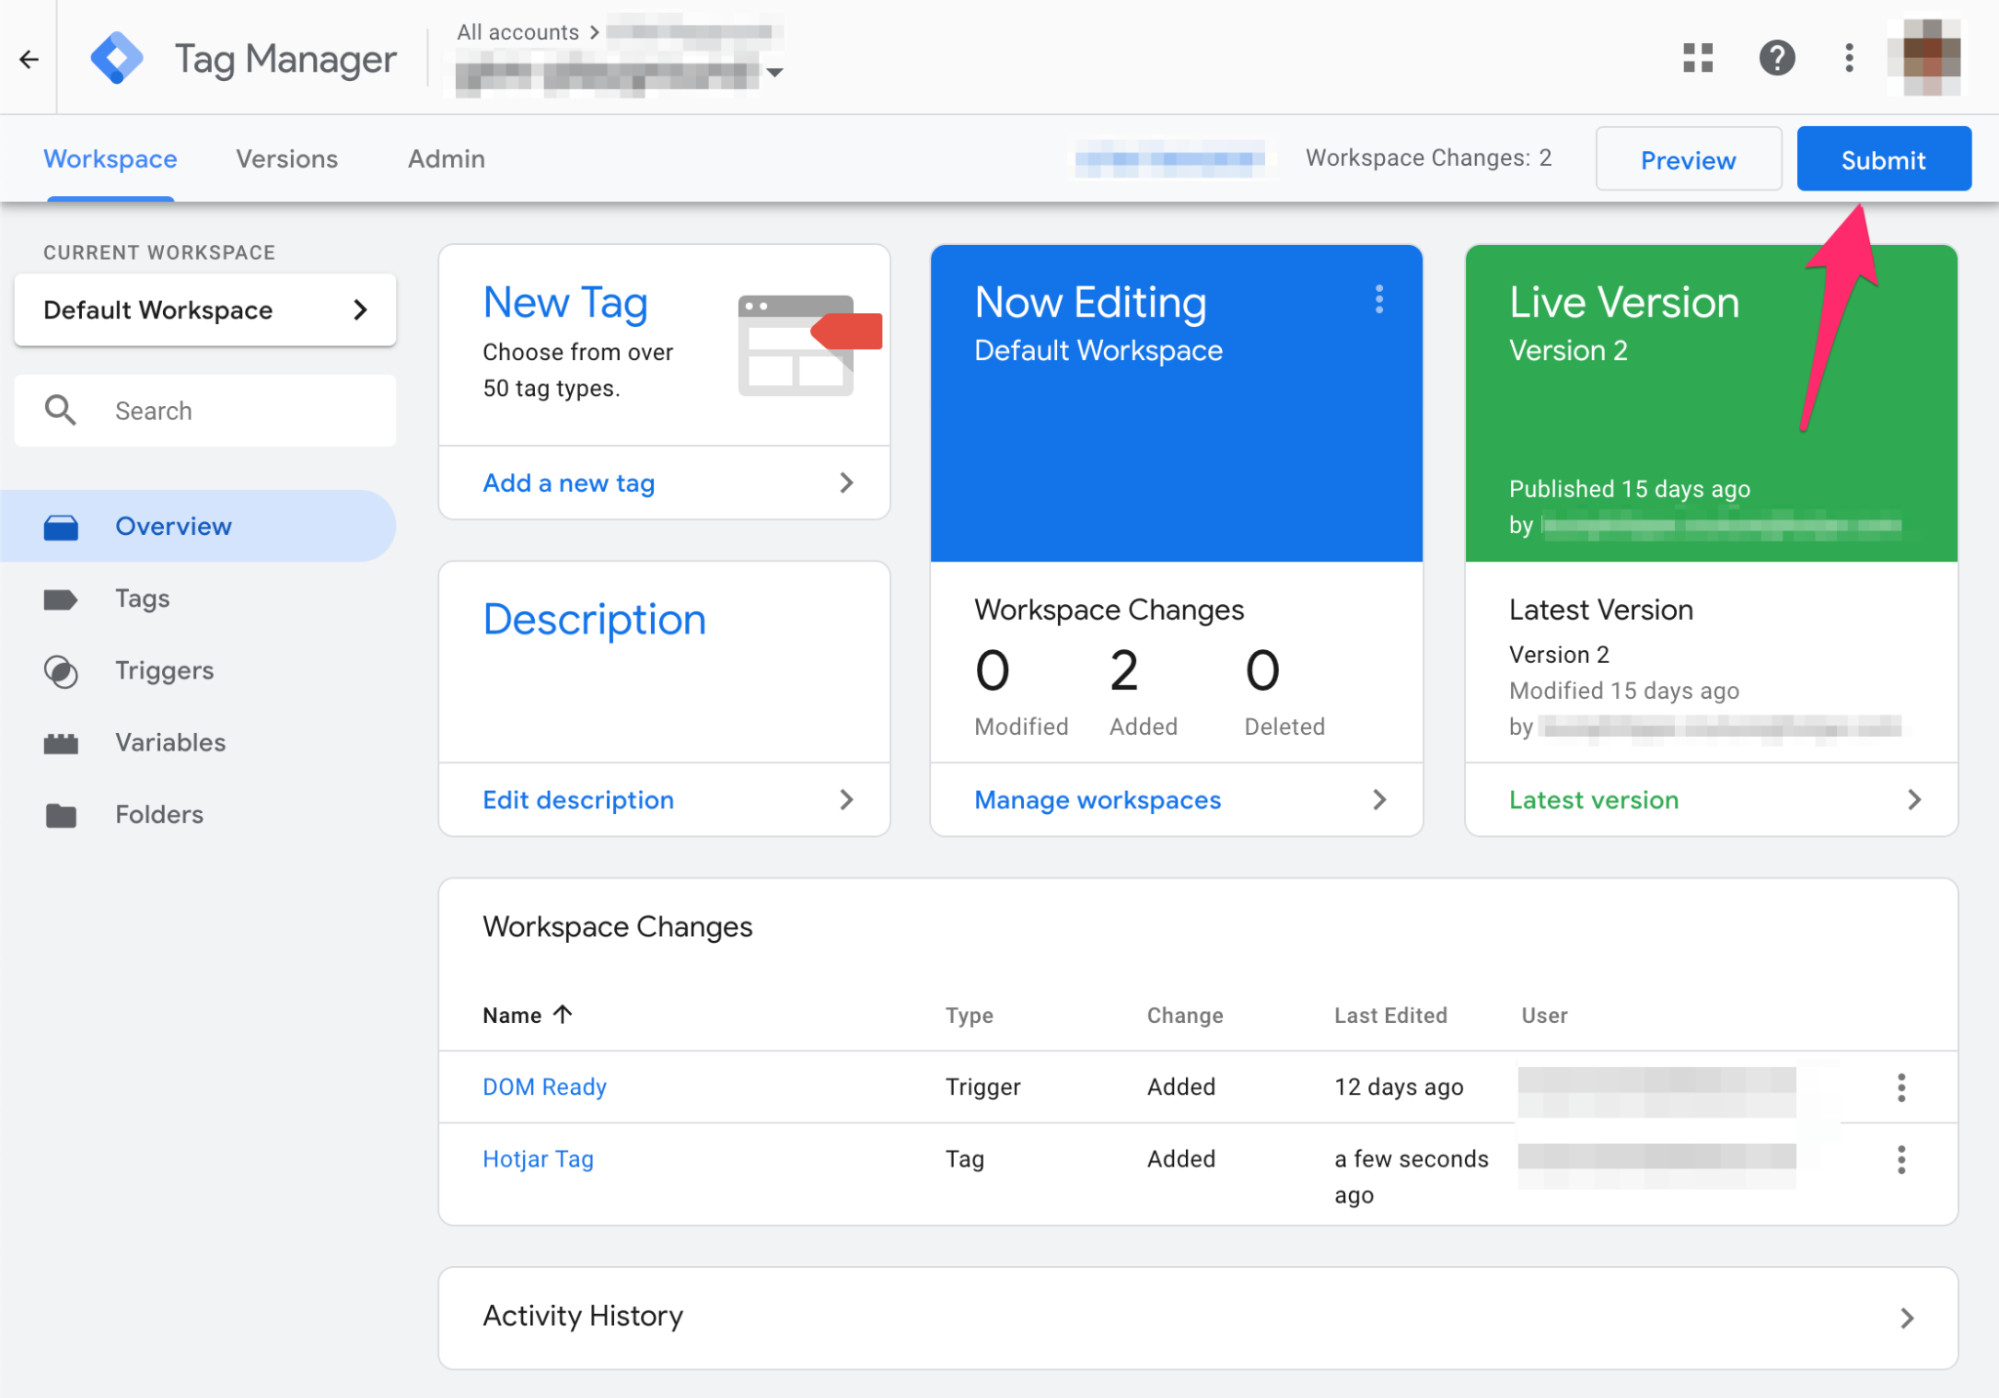
STEP 12: Ensure your live environment is selected, and then only click the Publish button.
To ensure GTM and WebMaxy are working properly, Continue the next step.
Adam Wilson #
Adam Wilson comes with an experience of 12+ years in the IT industry. As a Customer Success Manager, he has been researching and trying to understand the customers’ behavior in different scenarios. He has also studied human psychology to relate it to the purchase journey of the customers. His published books on customer psychology and behavior have received many honors and awards from various enterprises.
![How to set up a Google Analytics heat map [free]](https://beta.webmaxy.co/blog/wp-content/uploads/2022/10/google-analytics-heat-map-200x200.jpg "How to set up a Google Analytics heat map [free]")